South Carolina Camping, First T@B 400 Trip

South Carolina Camping

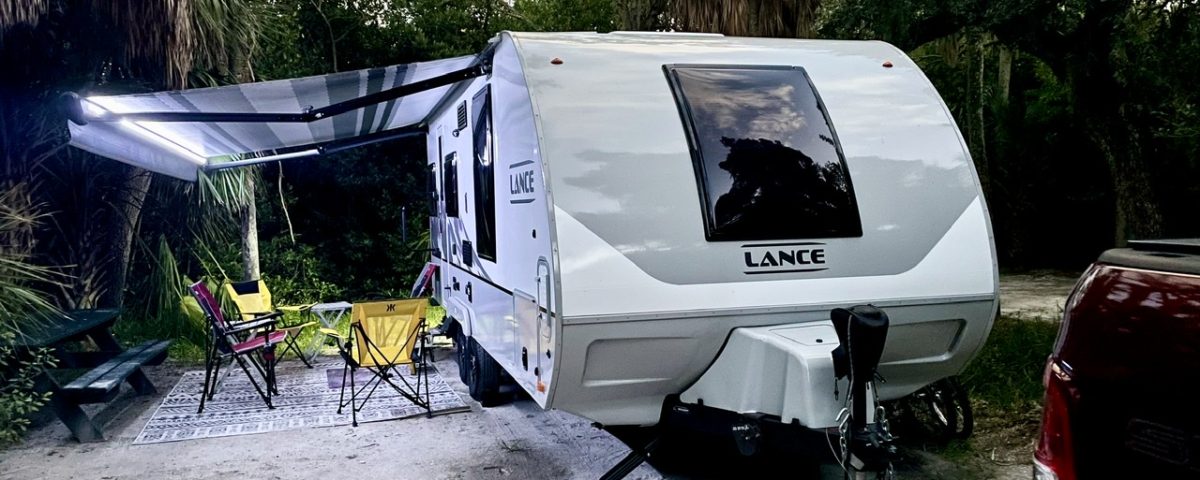
South Carolina camping was our first opportunity to use our new T@B 400. My separate post, Shakedown Trip in New TAB 400 covers the performance of the 400 on the trip.  We camped in two South Carolina State Parks, the first in Columbia, the State Capital and the second on the Atlantic.  Our trip began early in December and the fall colors were so beautiful!

Sesquicentennial State Park

South Carolina camping began in Columbia.  It was our very first campsite in the 400 and we arrived just before dark in the pouring rain.  Stressful!  Our set up went relatively well, but we were wet and cold when we were done.  We had dinner at a nearby restaurant and were very happy to be warm and dry.

South Carolina Camping
Sesquicentennial State Park Site 71

There were few campers at the campground.  We chose Sesquicentennial because it is in Columbia, which we wanted to visit.  Our site was close to the bathhouse and was nice for a state park, just a little too warm.   Though our 400 has a shower, we did not use it on this trip.  We will save it for boondocking.

Columbia Attractions

We had one full day to see the sights.   The rain was off and on for our sightseeing and the temperature was in the 70s.

South Carolina State Museum

The four story  museum has a variety of attractions, including a domed planetarium, a variety of exhibits, and a 4D interactive theater.  It is the largest museum in the state and seemed a good way to spend a rainy afternoon.  The museum offers an abundance of activities for children.

South Carolina State Museum

Many exhibits depicted early life in South Carolina like the one below.  In 1936, less than 2.5% of the state’s farms had electricity.  However, by late 1941, about 40% had acquired it and by 1959, 90% had public power through the efforts of the Rural Electrification Administration.

Rural Electrification Exhibit 1930-1955

Another interesting exhibit was the Hupmobile below.  I have never heard of one, but Detroit manufactured them from 1908 to 1941.  The car below was purchased in Columbia.  One interesting fact is that the Hupmobile appeared in front of U.S. Treasury on the 1920s-era $10 bill.

1927 Hupmobile
Rare 1927 Hupmobile
South Carolina State House

The State House was closed because we were visiting on a Sunday.  However, we did walk the grounds, which displayed beautiful fall colors.

South Carolina State House

The architecture of the State House was pretty cool, but it was the grounds that most impressed me.

State House Grounds

We had a fantastic meal at Pearlz Oyster Bar.  I wanted to have a SC classic, Frogmore Stew, aka Low Country Boil.   Pearlz did not disappoint—everything we had was amazing.  It was our best meal in the state!

Low Country Boil
Low Country Boil at Pearlz

Our two nights in Sesquicentennial were comfortable.  Our new camper and its Alde heater made it nice in the mornings to have breakfast inside.  We did not spend very much time in the campground, but it was quiet and peaceful.

Edisto State Park

South Carolina camping was next at Edisto State Park.  It was lovely, but more remote than I had imagined.  There was torrential rain the night before we arrived resulting in large puddles of water throughout the campground.  However, it was  was lovely and well-maintained.

South Carolina Camping at Edisto State Park
Edisto Site 53
South Carolina camping at Edisto
The beach just beyond our campsite

Nearby Attractions

There is much to see along the South Carolina coast and we tried to do as much as possible on our one full day allocated for seeing the sights.

Angel Oak Tree

The Angel Oak is a giant live oak tree on John’s Island. It is estimated to be 400-500 years old.  The tree is 66.5 feet tall and its longest branch is 187 feet long.   I love trees, particularly live oaks, so this one was a must see.  It was majestic!  We later learned that there is some controversy regarding the tree and the cost of producing electricity in the area.  I don’t know the specifics, but the tree is amazingly.

Angel Oak Tree
Morris Island Lighthouse

The lighthouse on Morris Island opened in 1876.  It is on an island that is shrinking and the shoreline is at the base of the lighthouse.  It is at great risk to be claimed by the sea and there are efforts to save it.  Boats take tourists to the island, but they cannot enter the lighthouse.  We viewed it from Folly Island via a beautiful walk along the beach.

Morris Island Lighthouse
Pralines in Charleston

We visited Charleston several years ago and loved it, but did not plan to spend time there on this trip.  However, Folly Island was quite close to Charleston.  So, we made a little side trip to pick up some pralines at Market Street Sweets.   They were wonderful!

Charleston pralines

Lastly, Edisto also provided us with an amazing sunset.

An Edisto sunset

We loved our South Carolina camping.   It is a beautiful state with friendly people, great food, and lots to see and do.  I’m glad we were able to spend several days there.

This trip ended in Pensacola at the Tiny Christmas Campout and was our  last trip of 2018.  For us, it was a great year for camping!

Retired couple


South Carolina Camping Update

We were unable to see everything we wanted on our first South Carolina Camping Trip, so we stopped at an area of interest while on our Long Summer Trip 2019.  Kings Mountain was our last stop on that trip.

Kings Mountain State Park

We stayed for three nights at the State Park.   The site we booked was terribly uneven and we exchanged it for one that was level, Site # 108.

South Carolina Camping at Kings Mountain
Site # 108

The park and the site were okay, but we had some terrible neighbors who were yelling and cursing late into the night.  Not very pleasant!

While there, my husband’s back began hurting because he was away from his routine at the gym for almost five weeks.  He spent a good bit of time on mats at the campsite doing back exercises.   I am happy to say the exercises helped a lot!

Kings Mountain Military Park

We were there to visit Kings Mountain Military Park, which is next to the State Park.  I am so glad we did because it provided some very interesting history that was new to us.  A major battle during the revolutionary war was fought on the mountain.

England was trying to recruit loyalists in the South to aid in the battle to the North.  England’s Major Patrick Ferguson had recruited an army of 1,000 loyalist militia and 100 red-coated Provincials.  The Patriots had 900 riflemen and were led by Virginia Col William Campbell.  The battle ensued on October 7, 1780 and the Patriot victory was said by Thomas Jefferson to be a turning point of the war. Ferguson died on the mountain and he was the only Englishman to fight in that battle.

Kings Mountain Battlefield Trail

The Park has a 1.5 mile trail on the battlefield.  The trail was wide and was made of soft rubber.  It had markers and monuments along the way.  However, at times it was quite steep.

1880 Centennial Monument
Made it to the Top

My husband complained a lot, but made it to the top.  I felt it was well worth the effort, but he was mostly glad it was over.

Kings Mountain Farm

The Farm was settled by a Scottish immigrant around 1765.  He was considered to be a “yeoman farmer”, neither rich nor poor.  There are several buildings on the property and a cotton gin.  The government purchased the property in 1935 for what would become the state park.  The Farm is very well-kept and we were told that events with people dressed in period clothing occurs occasionally.  It is really lovely!

The Farm at Kings Mountain
Carolinas Aviation Museum

Charlotte was very close,  so we visited the Aviation Museum.  My husband is a big fan of aircraft and I had to make up for the walk on the mountain.   The museum has the actual airplane that Captain Sully landed on the Hudson, plus many others.  The plane below was one of my husband’s favorites.  He also did a great job in the flight simulator.

Carolinas Aviation Museum

Lastly, we had lunch at a pretty cool restaurant, Cabo Fish Taco.  I had tacos with grilled scallops—delicious!

So glad we got to revisit South Carolina!

Shakedown Trip in New TAB 400

T@B 400 Shakedown Trip

The shakedown  trip in our new camper was planned several months earlier and we expected it to be on our T@G.   However,  we purchased the 400 sooner than expected and it was just prior to our rather long trip to South Carolina and Florida.

South Carolina camping
Our long path to Pensacola

The T@B 400

We have always camped in the much smaller T@G, so the 400 was a quite different experience.  If interested in our thoughts for making this change, check out Replacing Our Tiny Camper, A Big Step .

The trip of approximately 1,400 miles had been on the books for several months, but the timing of our T@B purchase just a few days before the trip meant that we would have a very long shakedown trip in the 400.  Yikes!

The Good and Great

The bathroom and indoor kitchen were wonderful!  It was pretty chilly in the early mornings and at nighttime because it was an early December trip.  Not having to go into the cold for the bathhouse late at night was amazing.   Preparing breakfast in a warm camper was pretty nice as well.

Speaking of warm, the Alde system did an excellent job of keeping both the water and the camper warm.    It was comfortably warm and also very quiet.

Set up and takedown were also very easy.  We do not need as much external camping gear as we needed with the T@G.

Both of us could easily stand in the camper and changing clothes was much easier.

T@B Wet Bath
Wet Bath

The Not So Good

Our gas mileage was awful!  I was expecting 12-13 mpg and we barely got 10 mpg.  The new vehicle had only 4,000 miles on it when purchased and I have been told it should get better.  I certainly hope so.

Our 400 is a Boondock Lite and is quite tall.  We like the extra height, but it can’t be good for gas mileage.

We were prepared for the bed to not be as good as our T@G because it was a king and had doors on both sides.   The 400 has a queen bed and access from only one side.  There is also the curve in the back of the camper that impacts one side of the bed.   My husband and I traded off sleeping in the back of the bed.  It really was not as bad as I expected, but this part was still a downgrade from the T@G.

T@B Issues

We expected some minor issues with the camper, but I must say we did not find anything significant.  Unfamiliar with the Alde, there was a learning curve, but it performed very well.  The temperature it shows is not the same temperature of the actual room, but it is my understanding that it is an Alde thing.

Our biggest issue was the size (18 gallons) of the gray tank.    The only thing that went into it was from dishes and hand washing because we took showers in the bathhouses, yet we had to dump gray water in the bathhouse a couple of times.  (We do not have one of those pull around tanks yet.)

There was also one shade that had to be pulled down carefully or it would bunch at the bottom, particularly on one side.  That side of the window has a bigger gap at the bottom than the other.

We will be following up with our dealer, Bankston RV,  about the shade.

The problem shade

Overall, I am feeling good about T@B 400 quality and our choice of camper based on this trip!

Tow Vehicle Shakedown

It was a shakedown trip for the Ford Expedition, our tow vehicle,  as well.  We bought it just a couple of days after the camper and felt good about its towing capacity of 9,000 pounds and a 900 pound tongue weight.   It is a V-6 with twin turbos and gets 24 mpg on the highway when not towing.   However, I was very disappointed at its mpg while towing.

Our Misadventure

We enjoyed the Expedition on the trip except for the low mpg.   It does have one annoying and potentially dangerous trait though.  The hands free function on the tailgate operates if you kick your foot under it.   It hit my husband in the head a couple of times as he was working around the hitch.  We tried disabling it, but then it was totally manual and my husband did not like that.

As we were stopped at the dump station in the last campground before heading home, I noticed our 7 pin was not yet connected.   In an attempt to protect my husband from the tailgate,  I took the keys from him and tossed them in the console of the car.  But then I decided to get out for a minute and all the doors immediately locked.   I had locked all keys, wallets, and phones in the car and it was running!

There was a code to the door, but with the rush to get ready for the trip, neither of us had committed it to memory.

It was about 6:30 in the morning and most of the campground was sleeping, but we had one friend who we knew had been up earlier walking her dog.   She rescued us!   We used her phone to call for help and waited in her warm truck for roadside assistance.

Conclusion

Despite our misadventure, our shakedown trip was wonderful and we love our new camper and tow vehicle.  (Needless to say, we both have memorized the code to our car door.)

Can’t wait to get out there again!

Retired couple


Camper Storage Checklist for nüCamp 400

Camper Storage, A First

Our new T@B 400 will be resting at a storage facility for the winter.   This is a first for us because our T@G was always in our relatively warm basement.  So, we will use this post as a camper storage checklist each year as we retire our camper for the winter.

Storage Checklist

1. Winterize the Fresh Water System

It is most important to ensure the camper’s fresh water system is adequately prepared  for storage.  If you reside in a climate that does not go below freezing, you can just drain all the water from the camper.  If, however, temperatures will go below freezing, then additional steps are necessary.  Additionally, we have a separate post for how we prepared our camper for freezing temperatures, Winterized our Camper Water System .

2. Have a Plan for Keeping the Battery Charged

Secondly, it is important to keep the battery charged.  A charged battery can withstand sub-zero temperatures, but a drained one can be destroyed in temperatures below freezing.  Therefore, it is important to keep a good charge on the battery.  There several ways to address this:  removal of the battery, providing a trickle charge, keeping it on shore power, or periodic charging of the battery.

Because we are storing our camper close to home, we will do periodic charging of the battery.  We will store it with the battery kill switch off because it  ensures there is nothing to draw energy.   So, I have put reminders on my calendar to check the camper and battery every couple of weeks.

Periodic Power Monitoring

a) First, turn on the power at the battery kill switch  and check the power level of the battery at the information panel.

b) If it needs a charge, connect to shore power to bring it up to a fully-charged level.  Note:  the power at the battery kill switch must be on to charge the battery.

c)  When the battery has a full charge, disconnect the power and turn the battery kill switch back to off.

Note:  when the camper is taken to storage, the battery should be fully charged.

Kill Switch is On
3.  Remove All Food From the Camper

It is very important to remove food from the camper because it attracts insects and wildlife.  Also, be sure to remove all canned and bottled items because they could freeze and burst.  Ensure that the microwave and stove are clean so there is not anything that would produce food odors.

4.  Clean the Camper

Wash the exterior and clean all the inside surfaces.  Vacuum the floor and remove any stains with soapy water.  If the floor is damp from cleaning, leave the windows open to allow ventilation while it dries.

5.  Remove linens and all fabrics

We removed all sheets, blankets, pillows, towels, etc.  We also removed our cushions and mattresses because we have read that they can sometimes be ruined by wildlife.  This may be overkill, but we don’t want to take any chances of them getting damaged.

We have a visor that we will also need to spray with Kiwi Camp Dry  to have it ready to repel water and make it easier to clean in our next season of camping.

5. Turn off Everything

a) Turn off the refrigerator by turning the setting to zero.  Leave the refrigerator door open and put an open box of  baking soda inside.

b). Make sure all lights, Alde System, range burners, television, and DVD player are off.    Also, ensure that both fan switches are off.

c) Turn off the propane at the valve.

d) Turn off all power to Camper by turning the kill switch to off.  (Battery image on top of switch appears upside down.)


Camper storage checklist last item
Kill switch is off
6.  Final Steps

a)  Ensure that the Camper is stored in a level position and stabilizers are down.

b)  Close and lock all windows.   Also, close all of the  shades.

c)  Place the cover over the air conditioner vent.

e) Place rodent repellent in camper.  We chose the one (see link next) below based on a  recommendation on a Facebook group.

Rodent repellent

f)  Place a moisture absorber in the camper because it will help to prevent corrosion, mold, and mildew.  The product below was in stock at our local Walmart (link) in the RV section.

Moisture absorber

g) Vent the Fantastic Fan 1/4” because nüCamp recommends it in the Manual.

h) Remove trailer hitch from SUV and place in storage unit.

i) Close and lock storage unit.

Camper Storage is done!

Our Storage Environment

Our camper will be in an unheated storage unit, so we will not have to consider any type of cover for it.  But, if it were outside and subject to UV rays and the elements, we would need a cover.  However, it is my understanding that one should be aware of extra moisture it may cause in some climates.

I had a lot of angst about getting our camper installed in the very tight space we have, but my husband got it in with the first try.  I was so impressed!

Camper is stored
Very little room to spare

So, we have tucked our new baby away for the winter and are at home planning our next adventures.

Hurry, hurry springtime!

Retired couple


Winterized our Camper Water System

Winterized our Camper, Twice

We winterized our camper just a couple of days after we purchased it because the local temperature was dipping into the twenties.  This resulted in scrambling to read manuals and watch YouTube videos.  The camper was taken on its maiden trip a few days after.   Having now winterized the camper twice, once when we first brought it home and again when we returned from a nine day trip, we feel we have a handle on it.

We are by no means experts in camper winterization, but believe our process will be adequate to protect it.  We hope this post will be helpful to others new to this process.   

Winterization Preparation 

We purchased RV antifreeze and a suction tube that attaches to the water pump at our local RV dealer.   The combo of hose and gallon of antifreeze was $12.99.  There’s also a kit on Amazon that includes the tube plus a few items we did not use.  

For our method, we only used one gallon of RV antifreeze, the kind that is non-toxic.  It is very important to only use RV antifreeze because you are dealing with your water system.

We turned off our Alde heating system before beginning the process.  We previously dumped our gray and black tanks at the campground.  As we had fresh water in our holding tank,  I ran a good bit of water into the sink and flushed the toilet several times to run fresh water through the tanks.  If connected to city water, you would want to disconnect after running some fresh water through the system.

Draining the System 

Before draining,  be sure that your camper is level from front to back and also right to left to ensure that everything drains properly. 

 1. Drain the fresh water tank.

The valve is located behind the wheel on the driver’s side.  It holds 30 gallons, so be sure to allow plenty of time for it  to drain.  It drains best when the camper is level.  

Drain Fresh Water Tank and winterized our camper
Fresh Water Tank Valve

2.  Flush Water Lines:   

After the fresh water tank is completely drained,  turn on the water pump and open each hot and cold water faucet.  Close each faucet when water stops.  Next, flush the toilet till no water flows.

3.  Low Point and Water Heater Drains:  

Open the two low point drains and the hot water heater drains.  They can be accessed through the rear compartment on the driver’s side.   The drains are located where the green circles are below.


Access area for drains

The low point drains are perpendicular when closed and parallel when open. They are open in the photo below.

Low point drains are open

The water heater drains are pointing up when open and are pointing forward when closed.  The Alde 3020 Manual recommends having all water taps open to drain the hot water tank.   It also recommends leaving the valves open during winterization.  Below is the page from the manual.

Alde drain information


Hot water drains are open

Allow all the water to flow out of the low point and water heater drains,  then close them.  When closed, they should look like the photo below.

Closed low point drains
4.  Drain the Holding Tanks:

I am assuming that the tanks were drained after the last camping trip, so you will only be draining the little bit of freshwater that was in the water lines.

Drained black and gray lines
Black and gray valves are opened and drained

5. Bypass the Hot Water Heater

Change the Bypass valve for the hot water system from “Normal” to “Bypass”.   We do this to prevent antifreeze from getting into the hot water system.  It should remain in this position until the camper is dewinterized and ready to be used again.

Bypass valve set to bypass

6.  Add the Antifreeze:

Turn on the pump for a couple of minutes because you want to get any water that might remain out and turn on a faucet to release it.

You are now ready to pump antifreeze into the water system using the pump, which is accessible through the wardrobe inside the camper.  

Water pump access point

Below is a photo of what we attached to the pump.  We removed the waterline that was going into the pump and attached the black  1/2” fitting below.  We then inserted the tubing into the antifreeze container.

Winterized our camper using this
Tubing and connector for water pump

Below is a photo of how it looked while attached.

Winterized our camper
Attached Pump device

Next, we ran the pump, which sucked the antifreeze into the water system.  While the pump was running, we turned on each faucet until we saw pink antifreeze coming out of it.   This included both hot and cold faucets in both sinks and the shower.  We also did this for the toilet and for the hot and cold faucets for the outside shower.

We have winterized our camper
Antifreeze has flowed into the sink

We used about 3/4 of a gallon of antifreeze through the pump.  Next, we  poured the remaining amount into the 2 sinks, shower floor,  and toilet.  

Winterized Our Camper:

We have now winterized our camper water system!  I will be following up later with a post on how we dewinterize to get ready to go camping.

Alternate Methods:

1)  Antifreeze into Fresh Water Tank

I have read that if you do not want to pump antifreeze directly into your system, you can use the fresh water system instead.   First, drain all possible water and then add approximately 3 gallons antifreeze directly into the fresh water tank.  Next, turn on the pump and open all faucets until the pink antifreeze is coming through.  You would also pour antifreeze into the drains (#7 above).

2) Blowout Method:

This process requires the following:

  • A a special adapter to attach to the city water inlet.
  • A regulated air compressor to blow the water out of the system.  The PSI should be set to no more than 30 PSI.
Blowout Air Valve
Air valve for blowout method

We recently used this method for a few freezing nights before going camping.  

All the drainage steps (1-5)  above would be used, except the drains and faucets would be left open for the blowout process.  They would then be closed and a total of approximately one gallon of antifreeze poured down the sink and shower drains and toilet.   There are also instructions on the web and YouTube for this method.

Winterized Our Camper Conclusion 

The steps above are just to prepare the water system for winter.    I have reviewed the manual and know there are other things we must do before we can put our camper safely away for winter.  

We never winterized our T@G camper because it slept in our basement when not on the road.  I was pretty comfortable with how to manage camping in our T@G and all that it entails.  Now, there is a new, more complicated camper to understand.   How we winterized our camper has been added to our  Camping Resources for New Teardrop Campers.

Looking forward to warmer weather and new camping adventures!

Retired couple