Hauling Bikes Camping With Lance 2075

Hauling Bikes Camping

Hauling bikes and camping goes hand-in-hand.  Campers travel to places with roads and trails that make bikes very enjoyable, yet a good method for hauling them isn’t always available.  We personally like having our bikes on camping trips.   However, we didn’t have a great method to haul them.

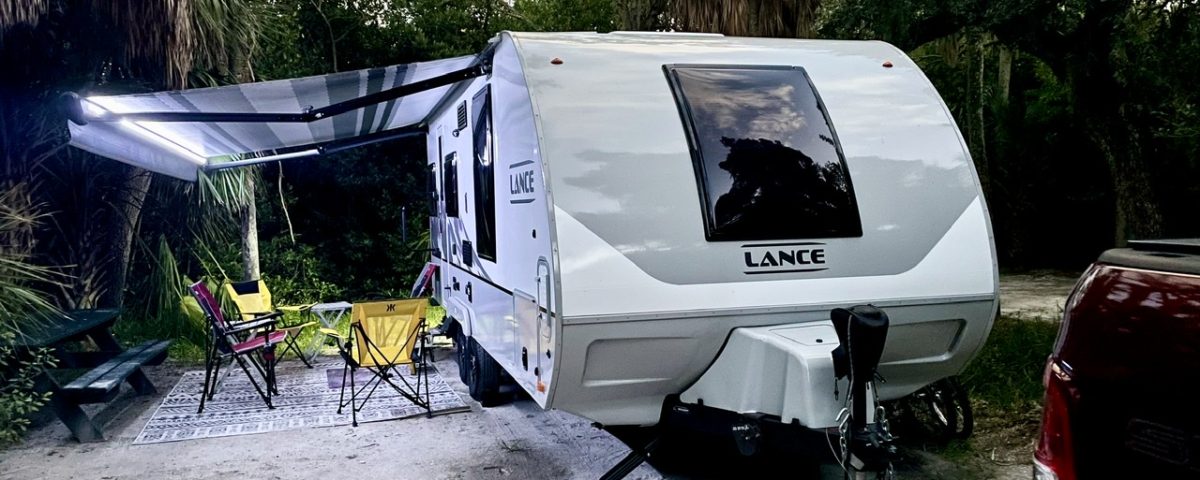
The Lance Rear Receiver

We were excited when we ordered our new 2021 Lance 2075 travel trailer. One main reason was because we planned to haul our bikes on the back.  We added the receiver as an option to the build of our camper.

Lance Receiver

So, we happily prepared to utilize the Lance Receiver.  First, we contacted eTrailer for a new bike rack.  Unfortunately,  information we learned from eTrailer eliminated the Lance receiver as an option for us.

  • Lance specifications limit the 1 – 1/4” receiver to 130 pounds.
  • Hauling behind a trailer requires a trailer-rated bike rack because its normal  motion fatigues bike rack metal over time.  The motion results in fine cracks and ultimately breakage.
  • No trailer-rated bike rack is available that also fits a 1 – 1/4” receiver.

I know that several Lance 2075 owners haul bikes on the back.  But we did not want to take the risk because a travel trailer-rated bike rack is not available that fits a 1 – 1/4” receiver.  An adapter to a two inch receiver would cut the capacity to 50% (65 pounds).

However,  one Lance owner had the back of the camper reinforced and a 2” receiver installed.  This option appears to safely enable hauling bikes on the rear of the 2075 trailer.

Trailer Tongue Option

Some people haul bikes on the tongue of their trailers.  Some teardrop trailer owners successfully use this option.   However, we were looking for something that would work with the heavier ebikes.   I am not aware of anyone using this option on these much heavier bikes.

Bikes in the Back of the Truck

Before we got our ebikes, we laid our regular bikes down in the bed of our truck under the tonneau cover.  It was a pain to get them in and out, but it worked.  However, our ebikes are larger and heavier and would not fit well under the cover.  So, we tried hanging them over the back of the tailgate using the Yakima Gatekeeper Tailgate Pad.  We also tried hauling them anchored upright in the bed.  Our bed is 6’4”, so the bikes had to travel with the front wheels turned.

Hauling Bikes over tailgate for Camping
Bikes hanging over tailgate
Hauling Bikes in bed of truck for camping
Bikes anchored inside the truck

This was doable, but there were some disadvantages.

  • It was very time consuming and quite exhausting to get them in and out of the truck.
  • There was little room for the things we normally carry in the truck.
  • Nothing in the truck was covered when it rains.

Front Receiver Option

While visiting Yellowstone National Park, my husband saw a truck with a bike rack and bikes on the front of a truck.  He spoke with the owner and learned that he was happy with the option.  It is extremely rare to see anyone with bikes on the front of a tow vehicle, but it got us thinking about trying it.

We talked to a local  truck accessory shop and got a quote for installation of a front receiver.  We asked if others use that option for hauling bikes and were told that a few do and they seemed satisfied with it.  It was not cheap, parts and labor were $418.  Our 2021 Ram 2500 Front Receiver has a 2” receiver and a 1,000 pound vertical and horizontal capacity.

The Bike Rack

Our bike rack decision was based on eTrailer’s recommendation.    Our ebikes are on the heavy side at sixty-six pounds each without the battery.  We needed one that would hold heavy bikes and also work with a front receiver and fat tires.  We settled on the Hollywood HLY64FNR .  It will carry two bikes weighing up to 80 pounds each.

Hollywood Bike Rack

The rack weighs 58 pounds and has the longer straps that are required for fat tires.  It also works with a rear receiver, so we can use it on the back of our SUV when not towing a trailer.

Hollywood Bike Rack on back of SUV

The Extender

We needed one more item to make this solution work for us, a hitch extender.  The receiver does not come out far enough to work with the bike rack without it.   We got the Curt 8” Hitch Extender from eTrailer.  The issue with using an extender is that it reduces the capacity of your setup by 50%. Our extender has a maximum tongue weight of 350 pounds.

The math works in this case.  The receiver normally has a capacity of 1,000 pounds, but 500 in our case.   The extender is the weakest link at 350 pounds tongue weight.  The bikes weigh 66 pounds times two which equals 132 pounds.  Adding the 58 pounds for the rack, we are at 190 pounds and well within our limits.

Our Solution for Hauling Bikes Camping

Of all the options, the front hitch offered the best camping experience.  It is relatively easy to get the bikes on and off the rack and we have the covered bed of the truck for camping accessories.

Hauling bikes camping
Bikes on Front of Truck

The Issues

While the front receiver is good in many ways, it isn’t a perfect solution.

Driver’s view with bikes on front
  • The bikes are exposed if it rains, but that was true for the other methods as well.  However, the bikes could be covered in the bed of the truck.  They can’t be covered in the front because the air must flow through the grill of the truck.
  • Bugs get on the bikes because they are on the front.  We minimize this by not driving as it begins to get dark.
  • The bikes are visible on the lower part of the windshield.  They don’t seriously obstruct the view, but they are in the line of sight.
  • Turning requires accommodation for the extended front.  A tight turn would have to be done more carefully.  In all situations, the front of the truck has a longer profile.
  • There is reduced clearance on the front of the truck.  We lost approximately four inches of clearance with the front bike rack installation.
Lower front clearance

While at the campground, we leave the bike rack on our vehicle.  It folds up, which makes it not stick out so far in the front.

View with folded bike rack

Hauling Bikes Camping Conclusion

We are happy with our current method for hauling our bikes while camping. For information on other things we have learned regarding camping, check out Camping Resources for New Campers.

Retired couple


Fresh Water Sanitation for Lance 2075

Fresh Water Sanitation

It is important to annually perform sanitation of the fresh water system on RVs.  I did an earlier post on this topic, Sanitize the Fresh Water System on the T@B 400.  It has general information on why it is necessary.  However, it was for our NüCamp 400 and the Lance 2075 sanitation process has a few differences.

Lance Differences

  • The Truma Combi water heater is in the 2075 and Truma instructs that bleach should not be used in it.  See page from Truma Combi manual  below.
  • More bleach is needed in the 2075 because the fresh water tank holds 45 gallons.  So, 3/4 cup of bleach is required.  (1/4 cup per 15 gallons)
  • Lastly,  one must bypass the Truma hot water heater to perform the Lance sanitation process.
Truma Fresh Water Sanitization
Truma Sanitization Instructions

Fresh Water Sanitation Steps

  • Empty the fresh water tank.
  • Perform steps to bypass Truma Combi water heater. (See below)
  • Put 3/4 cup of bleach (1/4 cup per 15 gallon tank) into a gallon container and fill with water.  Pour contents of container into the fresh water tank.
  • Fill fresh water tank with water.
  • Use pump to draw water through to all faucets to bring in the bleach water.
  • Allow bleach water to sit at least three hours or (preferably) overnight.
  • Drain the bleach water from the tank.
  • Fill the water tank with fresh water and pull it through the all faucets using the water pump.
  • Drain the water.
  • Reverse the steps used to bypass the Truma.

Truma Bypass Valve

Our Lance has a yellow tag near the bypass valve.  Once on bypass, I verified that our hot water heater was indeed not taking in water.  Water does flow to the hot water faucets, but no water flowed to the Truma.  (I could tell because I emptied the Truma and after drawing water to the faucets, it was still empty).

Our valve is right next to the door to the Truma compartment at the bottom.  The first photo below shows the normal valve position and the second is in bypass mode.

Bypass valve in normal position
Closed Valve in bypass position

In Conclusion

The process was easy, but a bit time-consuming.  I found that doing this increased my understanding of the Truma.

Happy Camping Y’all

Retired couple


How to Dewinterize the T@B 400

Ready to Dewinterize the T@B 400

So, you winterized your 400 and allowed it to rest during the cold weather.  Perhaps, you read my post, Winterized our Camper Water System.  Now, you are ready to get out there and go camping again.  Fortunately, it is quite easy to dewinterize the T@B 400.  For the water system, you basically just flush out the antifreeze.

Adding Water to the System

The 400 was thoroughly drained to winterize, but now is the time to add water back to the system.  First, ensure the drain to the fresh water tank is closed.  (It is located under the camper, near the wheel on the driver’s side.)  Fill the fresh water tank about half full.   The tank holds 30 gallons, so half filled is approximately 15 gallons.  Do not leave the camper unattended while adding the water as damage can occur if it is overfilled.

It is best to flush the antifreeze using the water holding tank and pump because it enables the identification of leaks in the system.  If the pump continues to run while faucets are closed, there is a leak somewhere.


Flushing the Antifreeze

Next, turn on the pump.  Then, one at a time, turn on each water source and let it run till you can no longer see any pink antifreeze.  Start with the cold water faucets in the kitchen and bathroom sinks, shower, and outside shower.  Then flush the toilet until pink antifreeze is no longer visible.  Lastly, turn on the hot water in kitchen sink, then bathroom sink, shower, and outside shower.

Once clear water flows through all water sources, you have flushed the antifreeze from your fresh water system.  The antifreeze is now in the black and grey holding tanks and is ready to be dumped into a sewer or dump station.  Do not allow it to drain into your lawn as it will kill plants.


Adjust the Bypass valve

The last step for the fresh water system is to adjust the bypass valve.   It kept the antifreeze away from the hot water heater on Bypass.  It needs to be set to normal to fill the hot water heater.  Move the lever on the Bypass Valve from “Bypass” to “Normal”.

Other Steps to Prepare for Camping

The detailed steps above merely addresses preparing the water system for camping.  Owners should also check tires, battery, propane tank, condition of safety chains, tightness of the hitch, proper seating of windows and doors, and condition of the camper exterior.

Additionally, wheel bearings should be lubricated once every year or at least every 10,000 miles.   See our post, Wheel Bearing Maintenance-A Safety Necessity.

Lastly, NüCamp recommends owners to sanitize the fresh water system annually.  A good time to do this is during dewinterization.   A link to the nüCamp manual follows, T@B 400 Manual.   The section on sanitation of the water system is on page 23.

We have Dewinterized the T@B 400 

You are now ready to get out there camping in your T@B!  Enjoy!

We dewinterized our T@B 400

New Campers, Unhitching and Setup of T@B 400

New Campers

I wrote this unhitching and setup post exclusively for new campers.  Experienced campers have already figured this stuff out and could possibly share better methods.   When we first began camping, we did not know anything at all about campers and how to use them.   I would have appreciated a post like this.  However, I could not find anything this basic and detailed.

We have now been camping for four years and this post reflects what we have learned and is how we setup our current camper, a nüCamp T@B 400.

Setup for New campers
New Camper Unhitching and Setup

The Order of Things

Some steps must be done in a specific order or must precede other steps.  Others can occur anywhere in the process.  In this post, I will always indicate when order is important and why.  Lastly, we have found that a standard practice makes our process more efficient and less prone to errors.  You develop a sort of muscle memory.

Level the Side-to-Side

This first step is essential if you have an unlevel site from side-to-side.  You should perform this check before other steps because the trailer must be hitched to raise one of  the wheels.  So, I use a small level that we keep in the camper to see if the the side to side is level.  If it is not level, we have two leveling pads that we drive the wheel over on the low side.  Often, we do not need these pads for leveling.  Sometimes, we need both pads and occasionally only one is needed.

New campers should check level status
Checking the side to side level status
Leveling pads
Leveling pads

It is important that the camper is level for the refrigerator and air conditioner to work properly and for accurate reading of tank levels.  Lastly, it is much more comfortable in a leveled camper.

Chock the Wheels

For safety, it is important to chock the wheels before any steps in the unhitching process begins.  An unchocked camper can roll and cause damages and possible injuries.  So, it is just a good practice to always do this before unhitching.

New campers must chock the wheels
Chocked wheel

Insert Wheel or Block

We currently use a block to unhitch and stabilize the front of our camper.  For maximum stability, we center it and lower the jack.  In our previous camper, we used a wheel.  However, we prefer the block.

Jack is supported by block
Remove 7-Pin Connector

You should remove the 7-pin connector before unhitching to prevent drain on the car battery and to get it out of the way of the hitch.

Remove the Chains and Breakaway Cable

You will want to get these out of the way before unhitching.  Regarding the chains, you should always cross them while towing.

Remove the Weight Distribution Bars

We have the Blue Ox Swaypro Weight Distribution Hitch and it requires the jack to lift the car to enable the bars to be removed.   Once the jack is raised, the bars can easily be removed.

Remove Hitch Lock

We always keep a lock attached to our trailer coupler.  It is vital while towing to ensure the trailer remains properly attached.   It is also beneficial as a  theft deterrent.  We previously used a long padlock, but wanted something that was easier to get off and on.  We settled on the Bulldog Adjustable Lock.

Lock recommendation for new campers
Bulldog Trailer Coupler Lock

So far, we really like the ease of putting it on and off.   It works much better than the padlock.   It fits snugly, which would make it difficult to cut off.

Bulldog Lock Installed on Coupler


Unhitching  From the Tow Vehicle

Next, lower the jack to release the strain off the ball.  Once lowered, pull up the lever on the tongue.  Now, lift it off the ball.  Ideally, the ball will drop from the jack.   Sometimes, it can be difficult to decouple.   In those circumstances, it may be necessary to pull forward or backward ever so slightly.  This is the most stressful step in the unhitching process for me.

Level Front to Back

Next, adjust the jack so that the camper is level from front to back.  I always set a level on the floor parallel to the door and it makes it easy to find that level sweet spot using the jack.

New campers should level front to back
Leveling from front to back
Lowering the Stabilizers

Lastly, lower the stabilizers.  This is the last step of unhitching and taking them up is the first step of hitching.  It is important because the stabilizers can be damaged if the camper is raised or lowered by the jack while they are down.

Camper stabilizers
Stabilizers are lowered

Setup

Now that the camper is unhitched, it is ready for setup.  Actually, you can attach the water and power before unhitching.  For example, if the weather is hot or cold, you might want to get the power on so the inside temperature can be impacted sooner.

Electrical Hookup

We recommend that you include a surge suppressor in your electrical hookup.  A suppressor can protect your camper’s electrical system if there is a problem with a campground’s power supply.  It can also identify electrical other issues.

Surge suppressor
Surge suppressor
 Connecting to City Water

We always attach a water pressure regulator  and a filter to our water connection.  The meter protects your water system if there is too much pressure in the campground.

I have a couple of tips regarding the water.  First, it is not necessarily to over tighten the connections.  Second, be sure the gasket is in the fitting of the hose.

Water pressure meter and filter
Connected to City water
Holding Tanks

We usually do not have sewer connections because most of our camping is in State Parks.  When we do have sewer at our site, we keep both the gray and black tanks closed until we are ready to empty.  I understand that it is critical to keep the black tank closed to prevent issues due to the lack of water.   Also, you wouldn’t want anything that might be in the sewer to have access to your camper.

Drain for Holding Tanks

New Campers, In Conclusion

It can be intimidating to set up a camper if you are inexperienced.  We learned how to do this over time, with some mistakes.  Now, we consistently strive follow the process above and have it down to a routine.  If this post is helpful to you,  check out our page,  Camping Resources for New Teardrop Campers.

Happy Camping!

Retired couple

A New Mattress for Our T@B 400

Why a New Mattress

The mattress was okay when we first purchased our T@B 400.  The bed was comfortable despite being smaller than the one in our T@G XL.   It offered decent support because of the Froli spring system, the new mattresses, and  the 2” foam topper we added from our old camper.

But, after almost two years of use, the bed had become quite uncomfortable.  The thin mattresses were not holding up well and the now four-year old foam topper had split where the mattresses tend to separate.   We needed an upgrade!

The IKEA Option

I asked a T@B Facebook group for recommendations.  Mimi, a very helpful lady, shared her solution:  an IKEA foam mattress trimmed to fit the 400.   She was so helpful that she also gave me a link to a current IKEA mattress similar to the one she had purchased.   It was $189, which I felt was a reasonable price.  I especially liked that it had a very well-made zippered mattress pad that is machine washable.

The Trim Process

The mattress came very tightly rolled and we transported it in the back of our SUV while returning from a camping trip.  We removed the foam from the cover and allowed it to sit for a few days to allow it to totally open and the smells to dissipate.  (This was recommended, but it did not have an odor to us.).

Earlier, in our camper, we had removed the old foam topper and measured the dimensions of the bed.  Below are my notes.  We did three cuts, one for length (78”), one for width (55”), and one 10” cut for the corner near the refrigerator (starting at 49” width and 71” length).  My note says the corner  is 9”, but I decided to cut 10”.  It worked well.  My husband used a serrated knife to make the cuts.  We marked places along the path on the smooth side of the foam and he cut using a straight edge as a guide.

T@B 400 Bed Dimensions

The foam has an egg crate pattern on one side and I verified that it should be on top.  It was important to remember this when making the corner cut.  It is described as 3  7/8” thick and below is a photo of the it.

A new Mattress
3 7/8” Foam

After the cuts, we zippered the foam into the mattress pad and installed it in the camper on top of the older mattresses.  It is a little higher than our previous bed because the new foam is thicker, but it works for us.  Note the corner cut in the photo below.

A new Mattress in our 400
View of the Corner

The Sliding Mattress Solution

Our old foam tore because there was excess space between the three mattresses.  We opted to insert a 2×4 along the back wall under the window. This forced the mattresses to sit flush against the two wall areas on the other side of the bed.  We don’t yet know if this will have the desired effect of keeping them still, but felt it was worth a try.

2 x 4 Insertion

Hindsight Thoughts

We are very happy with our new IKEA addition!  It is comfortable so far and the bed does not shift like it did before.

We measured very carefully to adjust the size to our specific bed.  However, I wish we had taken an additional inch off the height and width because it is a little tight.  But, I don’t think it would be worth the effort to cut again.

Our New, Comfortable Bed

Lastly, here is our made up bed, which is always a chore!

Ready for camping

If you would like to see some other ways we have attempted to improve our camping experience, please check out Camping Resources for New Teardrop Campers .

Wishing You Happy and Comfortable Camping!

Retired couple

Sanitize the Fresh Water System on the T@B 400

Why Sanitize the Fresh Water System

You should sanitize the fresh water system in your camper at least once a year.   It is important for several reasons.

  • Firstly, it helps keep the lines and tank fresh.
  • Secondly, it discourages the growth of bacteria that can contaminate the water supply and create illness.
  • Lastly, it is important to protect the water pump.   NüCamp recommends annual sanitation of the water system as well in the T@B 400 Manual.

When to Sanitize the Fresh Water System

This is a task that can be performed anytime, however, developing a routine is good so that it doesn’t get forgotten.   I think a good time is when getting the camper ready for a new season.  We plan to do this annually as we dewinterize our camper.

The Sanitation Process

All you need is a large flexible funnel,  one-gallon container,  and some household bleach.  Oh, and lots of water!

Sanitation of fresh water
Pour diluted bleach using a funnel
  1.  Begin with an empty water tank and ensure that the hot water heater is not on.
  2. Pour 1/2 cup of bleach into a gallon container and then fill the container with water. (One quarter cup of bleach is needed for every 15 gallons of water and the T@B 400 water tank holds 30 gallons.).  Pour the diluted bleach mixture into the fresh water tank using a funnel.
  3. Fill the fresh water tank with water.  Next, turn on the water pump and turn on each of the faucets to allow the bleach mixture to distribute to all areas.  Then, turn off the pump and faucets.
  4. Allow the bleach mixture to sit in the fresh water system for a minimum of three hours or as long as overnight.  You need this because it takes time to sanitize the system.
  5. After allowing the mixture to sit in the system, fully drain the fresh water tank.
  6. Next, refill the water tank with fresh water and turn on the water pump.  This will refill the hot water tank.
  7. Now you are ready to turn on all the faucets to bring the fresh water through.
  8. Continue to flush water through the faucets even after the bleach smell has subsided.  More is actually good in this case.
  9. Finally, you have sanitized your fresh water system!

While camping, we always take a Brita water filter.  It removes several undesirable elements from the water, including the odor and taste of chlorine.  I highly recommend using something like the Brita to eliminate any residual bleach effects.

The Hot Water Bypass Valve

While you should bypass the hot water tank when pumping antifreeze into the fresh water system, it is not needed for the sanitation process.  In fact, you want to include the hot water tank in the sanitation process.  Therefore, the valve should not be set to bypass.

Conclusion

We hope this post has been helpful to you!  Check out our page, Camping Resources for New Teardrop Campers for more tips on teardrop camping.

Happy Camping!

Retired couple

T@B 400 Modification and Third Year Camping

T@B 400 Modification

We began our third year of camping with a nüCamp T@B 400 Boondock Lite and we love it!  I have provided a link to the NüCamp T@B 400.  It is fantastic camper, as was our previous nüCamp product, a T@G MAX XL.   The 400 was designed with a lot of input from owners.  Consequently,  we did not need much in the way of T@B 400 modification.  We only made a few changes and most were in the front storage compartment.

Lever on Storage Compartment

My husband saw a Storage compartment lever on a later 400 model that was not on ours.  It holds the lid open with a shock.   We obtained the part at ùCamp 19 and my husband installed it.  It makes it much easier to use the storage compartment.

400 modification Lever for Storage Lid
Storage Compartment Lever

Enclosed Back of Compartment

The front storage compartment was totally open on the back, which could allow small items to slip through.  We don’t carry a lot of small items in there, but wanted the option to do so.  My husband added a piece of metal with holes throughout so the area would be ventilated.

400 Modification Back Panel
Back Panel for Storage Compartment

400 Modification, 2nd Propane Tank

For future boondocking, we wanted an additional propane tank, especially since our storage compartment is large enough hold it.   We had our dealer, Bankston, add the tank and holder while our camper was there for a replacement to a window shade.

400 Modification Extra Propane Tank
Extra Propane Tank

400 Modification-Zamp Connector

We purchased a Zamp Solar Suitcase when we had our T@G.  However, the T@B 400 does not come with a Zamp connection.  Because we hope to do more boondocking using the Zamp, my husband installed the connection.  I was very worried about putting a hole in our brand new camper, but he did an amazing job.   We have a separate post with step-by-step photos on how he did it:  Zamp Connector Added to our New Camper.

Zamp Connector
Zamp Connector

New United States Map

We attached our previous United States map to our T@G and we sold it last year.  So, we bought a new one just like our old one and filled in the states in which we have camped in both of our campers.  Somehow, I find it gratifying  filling in that map.

States visited
States Visited by Year Three

Camper Name

Our new camper has the same name as our first camper.  The T@G was named Endeavor, so the 400 became Endeavor II.  The T@G’s name was on the back , but that did not work with the 400.  We settled on the front of the 400 for the name and I think it looks pretty good.

I ordered the letters from DIY Lettering . It was easy to install and only $25.   We also added the blog’s URL in smaller letters on the side of the camper for $24.

400 Modification, Endeavor II
Endeavor II
Blog URL
Blog URL

400 Modification Not Done

In life, you can’t have everything.  We wanted the platform that we see on many T@Gs and T@Bs because it is really nice for storage.  I asked the experts at nüCamp about adding it to our 400 while we were in Ohio.  Sadly, they did not recommend adding the platform to our model despite the fact that our vehicle can handle a tongue weight of 900 pounds.

We can’t install the platform because our air conditioner is at the front of our camper, which could make the tongue weight too heavy relative to the overall weight of the camper if we added much weight on the platform.   The air conditioner for the 2020 model 400 was moved to the back of the camper and it allows the platform to be added.  The tongue weight of our 2019 model is 465, while the 2020 model is only 372 pounds.

Warranty Replacement

This was not a modification, but it is something altered on our camper.  The shade on our front window became somewhat difficult to close soon after we bought the camper.  It bunched up in one side at the bottom.  It would only close correctly if done very slowly.

Our dealer, Bankston RV, confirmed that our shade had some issues and a different one was currently being used.  Bankston ordered the replacement and installed it.   It lowers much easier now.  However, because the shade is so large and we want to keep the folds crisp, we keep it down when in our storage facility.

Camping Trips

All of our trips were in our new T@B 400 for this third year of camping.  We took five trips and traveled 5,988 miles for a total of 63 nights in the camper.  One trip was quite long with 35 nights and we took two trips each at ten and four nights.  All our camping was with groups except the trips to new states.  This was great because we really like camping with friends.

We have a  goal to camp in all fifty states.  I am happy to say that we added six new states this year to our map:  North Carolina, South Carolina, Virginia, West Virginia, Delaware, and Maryland.   Additionally, we camped in Alabama, Georgia, Ohio, and Florida, though not for the first time.  Can you tell I was an accountant?

Now Camping Year 4 Begins!
Retired couple


How to Use Your Phone to Watch TV

Using Your Phone to Watch TV

It enhances our camping experience to have the ability to use our phone to watch TV.  While we love camping and the freedom of being outdoors and visiting new areas, we really like to watch a little television before going to sleep at night.  Unfortunately, there are little or no options in some of the lovely, remote areas we like to visit.  That is where having the option of entertainment via our phone is so nice.

The Jensen TV in our camper is not a smart TV and I believe this is true for many campers.   However, any television can display content like a smart TV using the process described in this post.

Actually, it is quite easy to use a phone to watch TV and it is particularly useful when there is no cable and poor cell/Internet/air antenna reception.   I am specifically addressing the use of the iPhone or iPad with the Jensen TV.   I suspect there are similar options with android phones, but I am not familiar with them.

Here is What You Need

It is a very simple process, but a few essential components are needed.

1)   Content on Your Phone or Device

The foremost thing needed is access to a streaming source.  Netflix is probably the most popular streaming source and many watch Netflix on smart televisions.  With a Netflix subscription, one can also download shows and movies to their phone or tablet to watch later when no cable, Internet, or even cell signal is available.

We dropped cable many months ago and now all our viewing is through streaming services.  This link covers our conversion, Cable Cutting, A Retirement Cost Savings Strategy.    However, we had Netflix and Amazon Prime long  before dropping cable, both of which allow downloads to view when there is no cell/Internet service.  Just be sure to do a little planning to download a few shows/movies you like before arriving in remote areas.

When Internet or cell service is available, we also use our phone to watch TV through YouTube TV.  It provides live television and many channels, including local.   So, it essentially gives us as many options as we have at home!   The only concerns are the strength of the signal and data plan limits.

2)   Apple Lightning to Digital AV Adapter

The next item needed is this handy little adapter to connect the Apple device (iPhone or iPad) to an HDMI cable.  This link takes you to the adapter on Amazon,  Apple Lightning to Digital AV Adapter.  The cable currently sells for $49 and also has a receptacle to allow charging of the  iPhone or iPad while using the phone to watch TV.   It is also available through Apple and other retailers.

Use phone to watch TV with adapter
Apple Lightning to Digital AV Adapter
Adapter for phone to watch TV
Receptacle for HDMI Cable and Apple Charging Cable

We use this cable to listen to music on a stereo at home that does not have Bluetooth as well.  It is quite handy!

3)  HDMI Cable

The HDMI cable is the same on both ends—one connects to the Apple adapter above and the other connects to the television’s HDMI port.

HDMI cable
HDMI cable

For the Jensen TV on our camper, I wanted a short cable to keep the area around the television neat.  The following link is to a 1 ft HDMI cable that is only $7 and does a great job:  HDMI Cable .

Optional Equipment

After we began using our phone to watch downloaded shows and streaming channels, we discovered it was a pain to have to unhook cables between watching with an air antenna and the phone.    If we were in an area with good air antenna reception, we liked to use it for local stations.  So, it would be very beneficial to have the the ability to use both options without having to access the back of the television.  Our air antenna is just a piece of coaxial cable, but it does a remarkable job picking up channels if there is a good signal.

Air antenna on teardrop camper
Air antenna

Our solution was a splitter to switch between antenna and phone.   The item sells for approximately $10 and a link follows to the item on Amazon:   Signal Splitter.

Signal Splitter to use phone to watch TV
Signal Splitter

For this option, two short HHMI cables are used.  One end goes into the top of the splitter and the other end goes into the back of the television, as in the photo below.

HDMI cable inserted in Jensen Television
HDMI Cable inserted in back of Jensen Television

Now for the bottom of the splitter:  insert the television cable into one side of the splitter instead of into the back of the television.  Next, plug the other short HDMI cable into the other side of the bottom of the splitter.   Lastly, attach the other side to the Apple Lightning to AV Adapter, which attaches on the other side to the phone.

Splitter for Jensen Television
Splitter and cables attached

With this configuration, the signal can be changed from air antenna to phone by pressing button one or two.

If you are interested in the basic operation of the Jensen TV/ DVD player, check out my post, Jensen TV and DVD Player—Basic Use .

Please let me know if this is helpful.  Happy camping!

Retired couple

Zamp Connector Added to our New Camper

Zamp Connector Needed

Our first camper, a T@G MAX, had a Zamp Solar connector.   Because  of this, we purchased a Zamp Solar Suitcase.   We liked using it and expected our new camper to be wired for Zamp as well.  However, our nüCamp T@B 400 is not wired for Zamp.

So, this became our first official modification on the 400.  I wanted to use the solar suitcase, but was concerned about drilling a hole into our new camper.  My husband convinced me that he could do it without creating any issues.    He did a fantastic job and it works great!   I am sharing his step-by-step instructions for any of you who might also want a Zamp connector.

Items Used

Zamp Connector and Wire
Tools used
  • Zamp Connector with wire.  We purchased the connector and 10’ of the wire for $23.  You can get the connector cheaper with a very short wire, but we did not want to splice to add needed wire.
  • Painter’s Tape
  • A drill.
  • Drill bit for screws  1/8” Jobber Drill Bit.
  • Drill bit 1/4” for pilot hole.
  • Paddle bits:  7/8”, &  11/16”.
  • 4 Phillips Head screws, #8 x 3”, type A point.
  • 2 each 3/8” Lugs, 12 gauge.
  • Silicone, clear.

The Hole

To begin, he put painter’s tape on the drill spot to protect the finish and to mark it.

Painting tape to protect finish

The hole in our new 400 was really three holes.   Firstly,  he drilled a 1/4” pilot hole approximately 3/8” deep to start the hole.   Secondly, he drilled a 7/8” hole that was 1/8” deep.  It is for the lip of the flange.  Lastly, he drilled an 11/16” hole all the way through the camper wall.  This is to accommodate the bulk of the connector.

Zamp Connector hole
Three-stage hole for Zamp

Attaching the Zamp Port

The Zamp connector fits perfectly into the hole and the four screws attach it securely to the wall of the camper.  My husband marked the spot before drilling, drilled the holes, and tightened the screws.  Next, he applied silicone around the connector to seal the area from water.

Zamp Connector inserted into hole

The above wire extends to a heavy duty distribution stud that can be accessed under the bed.

Connecting to the Batteries

Next, he connected the wire to the batteries.  We have two six-volt AGM batteries and the Zamp connector can access them via a heavy duty distribution stud that came installed in the camper.  You may be connecting to a single battery and not using the distribution studs.

View under the bed
View of battery posts

Also, my husband cut approximately 4 feet of surplus wire.  He then crimped and soldered the black and red wires.  He also added shrink tube to the ends.

We were a little concerned about how to attach the wire to the battery posts because of everything we have heard about reverse polarity and the Zamp.   So we contacted Zamp and they explained to us that the positive wire would be coming from the male lead on the port.  For our cable, it was red, so we basically just attached the red cable to the positive post and the black to the negative post.

We asked the Zamp technician what would happen if we connected it wrong.  He said that it would just show an error on the charge controller.  That made us feel better.

Conclusion

Finally, we gave it a trial run in our driveway and it worked beautifully.   So, we now have a Zamp port on our new camper just like we had on our first camper.   My husband also ordered a Zamp decal.  I would have been good without the decal, but love the port.

Our page, Camping Resources for New Teardrop Campers , has other posts related to how we solve our camping needs as new campers.   So, you might want to check it out.

We can’t wait to take our camper with its new Zamp port on the road!

Retired couple


Shakedown Trip in New TAB 400

T@B 400 Shakedown Trip

The shakedown  trip in our new camper was planned several months earlier and we expected it to be on our T@G.   However,  we purchased the 400 sooner than expected and it was just prior to our rather long trip to South Carolina and Florida.

South Carolina camping
Our long path to Pensacola

The T@B 400

We have always camped in the much smaller T@G, so the 400 was a quite different experience.  If interested in our thoughts for making this change, check out Replacing Our Tiny Camper, A Big Step .

The trip of approximately 1,400 miles had been on the books for several months, but the timing of our T@B purchase just a few days before the trip meant that we would have a very long shakedown trip in the 400.  Yikes!

The Good and Great

The bathroom and indoor kitchen were wonderful!  It was pretty chilly in the early mornings and at nighttime because it was an early December trip.  Not having to go into the cold for the bathhouse late at night was amazing.   Preparing breakfast in a warm camper was pretty nice as well.

Speaking of warm, the Alde system did an excellent job of keeping both the water and the camper warm.    It was comfortably warm and also very quiet.

Set up and takedown were also very easy.  We do not need as much external camping gear as we needed with the T@G.

Both of us could easily stand in the camper and changing clothes was much easier.

T@B Wet Bath
Wet Bath

The Not So Good

Our gas mileage was awful!  I was expecting 12-13 mpg and we barely got 10 mpg.  The new vehicle had only 4,000 miles on it when purchased and I have been told it should get better.  I certainly hope so.

Our 400 is a Boondock Lite and is quite tall.  We like the extra height, but it can’t be good for gas mileage.

We were prepared for the bed to not be as good as our T@G because it was a king and had doors on both sides.   The 400 has a queen bed and access from only one side.  There is also the curve in the back of the camper that impacts one side of the bed.   My husband and I traded off sleeping in the back of the bed.  It really was not as bad as I expected, but this part was still a downgrade from the T@G.

T@B Issues

We expected some minor issues with the camper, but I must say we did not find anything significant.  Unfamiliar with the Alde, there was a learning curve, but it performed very well.  The temperature it shows is not the same temperature of the actual room, but it is my understanding that it is an Alde thing.

Our biggest issue was the size (18 gallons) of the gray tank.    The only thing that went into it was from dishes and hand washing because we took showers in the bathhouses, yet we had to dump gray water in the bathhouse a couple of times.  (We do not have one of those pull around tanks yet.)

There was also one shade that had to be pulled down carefully or it would bunch at the bottom, particularly on one side.  That side of the window has a bigger gap at the bottom than the other.

We will be following up with our dealer, Bankston RV,  about the shade.

The problem shade

Overall, I am feeling good about T@B 400 quality and our choice of camper based on this trip!

Tow Vehicle Shakedown

It was a shakedown trip for the Ford Expedition, our tow vehicle,  as well.  We bought it just a couple of days after the camper and felt good about its towing capacity of 9,000 pounds and a 900 pound tongue weight.   It is a V-6 with twin turbos and gets 24 mpg on the highway when not towing.   However, I was very disappointed at its mpg while towing.

Our Misadventure

We enjoyed the Expedition on the trip except for the low mpg.   It does have one annoying and potentially dangerous trait though.  The hands free function on the tailgate operates if you kick your foot under it.   It hit my husband in the head a couple of times as he was working around the hitch.  We tried disabling it, but then it was totally manual and my husband did not like that.

As we were stopped at the dump station in the last campground before heading home, I noticed our 7 pin was not yet connected.   In an attempt to protect my husband from the tailgate,  I took the keys from him and tossed them in the console of the car.  But then I decided to get out for a minute and all the doors immediately locked.   I had locked all keys, wallets, and phones in the car and it was running!

There was a code to the door, but with the rush to get ready for the trip, neither of us had committed it to memory.

It was about 6:30 in the morning and most of the campground was sleeping, but we had one friend who we knew had been up earlier walking her dog.   She rescued us!   We used her phone to call for help and waited in her warm truck for roadside assistance.

Conclusion

Despite our misadventure, our shakedown trip was wonderful and we love our new camper and tow vehicle.  (Needless to say, we both have memorized the code to our car door.)

Can’t wait to get out there again!

Retired couple


Page 1 of 3
1 2 3