New Campers, Unhitching and Setup of T@B 400

New Campers

I wrote this unhitching and setup post exclusively for new campers.  Experienced campers have already figured this stuff out and could possibly share better methods.   When we first began camping, we did not know anything at all about campers and how to use them.   I would have appreciated a post like this.  However, I could not find anything this basic and detailed.

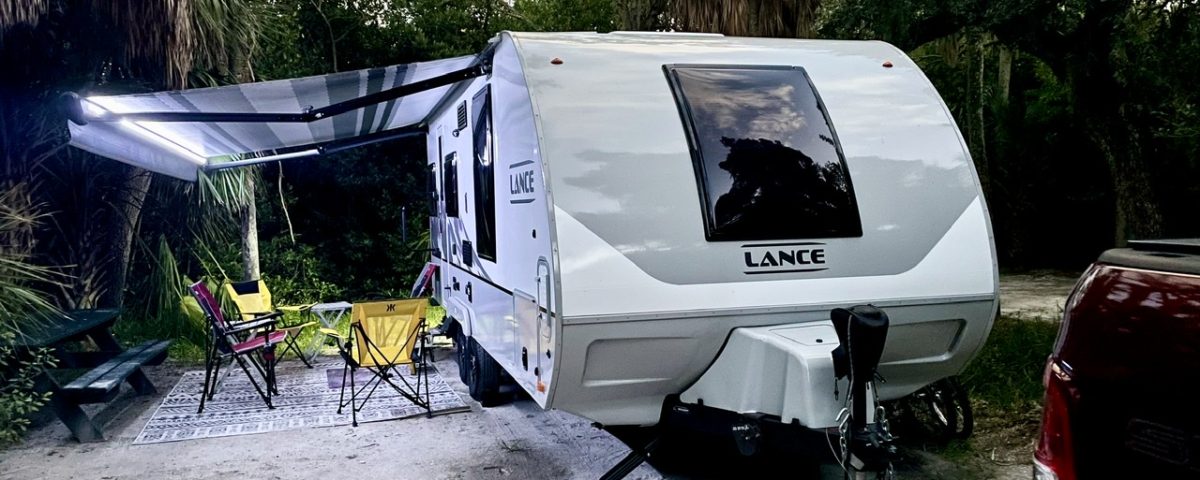
We have now been camping for four years and this post reflects what we have learned and is how we setup our current camper, a nüCamp T@B 400.

Setup for New campers
New Camper Unhitching and Setup

The Order of Things

Some steps must be done in a specific order or must precede other steps.  Others can occur anywhere in the process.  In this post, I will always indicate when order is important and why.  Lastly, we have found that a standard practice makes our process more efficient and less prone to errors.  You develop a sort of muscle memory.

Level the Side-to-Side

This first step is essential if you have an unlevel site from side-to-side.  You should perform this check before other steps because the trailer must be hitched to raise one of  the wheels.  So, I use a small level that we keep in the camper to see if the the side to side is level.  If it is not level, we have two leveling pads that we drive the wheel over on the low side.  Often, we do not need these pads for leveling.  Sometimes, we need both pads and occasionally only one is needed.

New campers should check level status
Checking the side to side level status
Leveling pads
Leveling pads

It is important that the camper is level for the refrigerator and air conditioner to work properly and for accurate reading of tank levels.  Lastly, it is much more comfortable in a leveled camper.

Chock the Wheels

For safety, it is important to chock the wheels before any steps in the unhitching process begins.  An unchocked camper can roll and cause damages and possible injuries.  So, it is just a good practice to always do this before unhitching.

New campers must chock the wheels
Chocked wheel

Insert Wheel or Block

We currently use a block to unhitch and stabilize the front of our camper.  For maximum stability, we center it and lower the jack.  In our previous camper, we used a wheel.  However, we prefer the block.

Jack is supported by block
Remove 7-Pin Connector

You should remove the 7-pin connector before unhitching to prevent drain on the car battery and to get it out of the way of the hitch.

Remove the Chains and Breakaway Cable

You will want to get these out of the way before unhitching.  Regarding the chains, you should always cross them while towing.

Remove the Weight Distribution Bars

We have the Blue Ox Swaypro Weight Distribution Hitch and it requires the jack to lift the car to enable the bars to be removed.   Once the jack is raised, the bars can easily be removed.

Remove Hitch Lock

We always keep a lock attached to our trailer coupler.  It is vital while towing to ensure the trailer remains properly attached.   It is also beneficial as a  theft deterrent.  We previously used a long padlock, but wanted something that was easier to get off and on.  We settled on the Bulldog Adjustable Lock.

Lock recommendation for new campers
Bulldog Trailer Coupler Lock

So far, we really like the ease of putting it on and off.   It works much better than the padlock.   It fits snugly, which would make it difficult to cut off.

Bulldog Lock Installed on Coupler


Unhitching  From the Tow Vehicle

Next, lower the jack to release the strain off the ball.  Once lowered, pull up the lever on the tongue.  Now, lift it off the ball.  Ideally, the ball will drop from the jack.   Sometimes, it can be difficult to decouple.   In those circumstances, it may be necessary to pull forward or backward ever so slightly.  This is the most stressful step in the unhitching process for me.

Level Front to Back

Next, adjust the jack so that the camper is level from front to back.  I always set a level on the floor parallel to the door and it makes it easy to find that level sweet spot using the jack.

New campers should level front to back
Leveling from front to back
Lowering the Stabilizers

Lastly, lower the stabilizers.  This is the last step of unhitching and taking them up is the first step of hitching.  It is important because the stabilizers can be damaged if the camper is raised or lowered by the jack while they are down.

Camper stabilizers
Stabilizers are lowered

Setup

Now that the camper is unhitched, it is ready for setup.  Actually, you can attach the water and power before unhitching.  For example, if the weather is hot or cold, you might want to get the power on so the inside temperature can be impacted sooner.

Electrical Hookup

We recommend that you include a surge suppressor in your electrical hookup.  A suppressor can protect your camper’s electrical system if there is a problem with a campground’s power supply.  It can also identify electrical other issues.

Surge suppressor
Surge suppressor
 Connecting to City Water

We always attach a water pressure regulator  and a filter to our water connection.  The meter protects your water system if there is too much pressure in the campground.

I have a couple of tips regarding the water.  First, it is not necessarily to over tighten the connections.  Second, be sure the gasket is in the fitting of the hose.

Water pressure meter and filter
Connected to City water
Holding Tanks

We usually do not have sewer connections because most of our camping is in State Parks.  When we do have sewer at our site, we keep both the gray and black tanks closed until we are ready to empty.  I understand that it is critical to keep the black tank closed to prevent issues due to the lack of water.   Also, you wouldn’t want anything that might be in the sewer to have access to your camper.

Drain for Holding Tanks

New Campers, In Conclusion

It can be intimidating to set up a camper if you are inexperienced.  We learned how to do this over time, with some mistakes.  Now, we consistently strive follow the process above and have it down to a routine.  If this post is helpful to you,  check out our page,  Camping Resources for New Teardrop Campers.

Happy Camping!

Retired couple

Wheel Bearing Maintenance-A Safety Necessity

This post is for new campers who may not be aware of important maintenance that should be routinely performed on the wheels of their campers for safety.

Reasons for Wheel Bearing Maintenance 

Wheel bearing maintenance is not an exciting topic, but it is something in which campers should know.  As members of several Facebook camping groups, we have learned that wheel bearings on campers should be packed with grease routinely.   On this topic, we have seen recommendations for annually and for every 10,000 miles.

This maintenance prevents unnecessary friction on the bearings and enables the identification of worn bearings or a dry axel.  Grease breaks down over time and the heat generated during braking speeds up that process.  Therefore, adding fresh grease addresses this problem.

This maintenance is an important safety procedure.  First, if  bearings are not properly greased, the wheels could lock up and cause an accident.   Additionally, the axel could also be damaged by improperly greased wheels.

Our Wheel Bearing Maintenance

As we have had our camper for about eighteen months and have towed it close to 10,000 miles.   Clearly, it was time to perform this maintenance.

We contacted a local RV dealer to have the work done as my husband has a very bad knee.  They said that they do not usually do the work and that it would be a significant wait.  However, they informed us that a local tire dealer has a person who routinely does this task.    We contacted him and got an early morning appointment.   The technician completed the task in a couple of hours for $150.

E-Z Lube System

We later learned that if you have one of the later NuCamp campers with the E-Z Lube System, it is a very easy and quick process to add fresh and remove old grease using a grease gun.   Our camper has this Lube System.  The link below is to  a very informative video with detailed instructions.  If we had known it would be this easy, we would have done this ourselves.

https://youtu.be/XT0RKDGgDm8

It seems that many who own campers do this work themselves.  To assist, there are several YouTube videos with detailed instructions.  It is my understanding that it does not require a lot of special tools.

Sealed Bearings on Some Models

There is one last bit of information provided by a reader of this post.  Early T@B models have sealed bearings that cannot be cleaned or repacked and it was recommended that owners keep a set of bearings with them as spares.  This is probably true for some other camper models as well.   It would be a good idea to determine if this is true for your camper if you have an older model.

Whether you do it yourself or find an expert to do the job for you, I encourage new campers to not ignore wheel bearing maintenance, an important safety task.

If you would like to read more about what we have learned on our camping adventures, we have a Camping Resources page for new campers you might want to visit.

Happy and Safe Camping!


Reflections on Our First Long Camping Trip

This post is directed to new campers who have not yet made a long trip. Included is detailed information that would have been helpful to us. The trip was four times longer than our previous ones and just under 5,000 miles. It gave us an opportunity to see nine states and three national parks.

First Long Camping Trip Recap

Our first long camping trip was four times longer than our previous trips and nine times as many miles.  The trip lasted twenty-seven days during the last month of winter, beginning mid-February and ending mid-March.  We camped in Mississippi, Texas, New Mexico, Arizona, California, Nevada, Utah, Oklahoma, and Louisiana.

We wanted to accomplish a few things.  First, to get away from the boredom and cold of winter, so we needed to go south.  With a teardrop camper, we would not be comfortable if was very cold outside.  Second, we wanted to visit as many states as was practical.  We have a goal to camp in all the lower forty-eight.  A southwestern path all the way to California became our choice with a more northerly return to include a Utah if the weather permitted. Lastly, we wanted to experience something of the local area at each stop, knowing we could not see everything.  An earlier post details the planning we did for this first long camping trip.  Planning That First Long Trip

Our Concerns

It was an ambitious goal for us of towing just under 5,000 miles, much in areas we have not visited nor driven.   It was also a lot of together time.  We generally get along well together, but a month in a vehicle and tiny camper was new territory indeed!

First long trip

The Campgrounds

There were stops in 17 different areas, nine states, and 18 campgrounds.    The type of campground with number of visits and average costs per night were as follows:

  • Five State Parks, $27.11
  • One County Park, $20
  • Five KOAs, $40.49 (with KOA membership)
  • Three Small Commercial Campgrounds, $27.77
  • Three Large Commercial Campgrounds, $45.13
  • One Large Commercial Campground Overflow, $15

The campground prices did guarantee enjoyment of them.  Ironically, the most expensive campground was our least favorite.  The small campgrounds and State Parks were overall the best, offering a comfortable stay, reasonable privacy, and a relatively low price.  The KOAs were consistently near popular areas and provided full hookups, laundry, and nice bathhouses.  The large RV campgrounds were our least favorite.  They offered full services and generally some extra entertainment, but little privacy.  They seemed to cater to longer term guests.

Campground Challenges

Two campgrounds did not have showers.  Okay for one night, longer stays or a string of them would not be desirable.  One had  pit toilets, but it was not an issue.  We were in overflow one night at a large RV campground  with no electricity and water.  The water was not an issue as we had access to very nice facilities, but we sorely missed the electricity.  We were a bit cold overnight and concerned we would drain our battery.

Though we visited three national parks, we did not stay at the national campgrounds.  Most sites did not have hookups and we did not have solar panels or a generator.  Also, reservations should be made early for the national parks as they fill up quickly.

To Reserve or Not

Reservations give you a better shot at desired campgrounds, but take away flexibility.  If you are having a very good or very bad time in an area, you may not be able to cut your stay short or stay longer if reservations are upcoming.  Also, we were traveling in the winter in a camper that does not provide comfortable daytime accommodations.  Our solution was to book the first few sites, including Big Bend, the single national park we were certain to visit.  We wanted to visit two others in Utah, but they are much further north.  If the weather was bad, we did not want to risk travel in ice or snow.

It actually worked out well for us.  We booked stops one, two, three, and five.  The remainder were booked a couple of days out.  We were very lucky to get our spot at Augua Caliente State Park in California, but struggled in Tucson and spent one night without electricity.

If traveling during the popular times in an area, reservations are more critical. We are making a second long trip later in the year and are reserving all the stops, but will be traveling during popular times.

Our Campsites

We did not stay long at any one place and spent the majority of our time away from the campgrounds, so our set up was always very simple.  If we were only at a site for one night, we often did not even connect the water as it was cold outside in the early morning and we frequently had breakfast away from our camp.

Setup and breakdown was very quick and easy.  We just put the items that were being transported in the cabin on a picnic table, stabilized the camper, and plugged in the electricity.  Below is an example of how simple our sites were for much of the trip.  We were basically traveling with our camper as our bed versus spending time in a campground.

Hurricane Utah

We used our Kingcamp awning a few times in places with longer stays when shade was needed.  It was nice to have and setup was quick and easy.

Yuma Arizona

Packed Versus Needed

Two items were never used:  a small attachable tent and a porta potty.  We managed to always be within a reasonable distance from restrooms and the tent was not needed as so much time was spent away from the sites.

We took a bit more food than was needed and had our footlocker with all our  dishes.  Had we known how little cooking would be done, we could have greatly reduced the dishes.  We also took a small folding table that was only used once.  We could have easily done without the table.

Clothing for a week was packed with the intent to do laundry.  This worked pretty well.  We had some winter outerwear that was not used and could have used a little more lightweight outerwear.

Biggest regret: no solar panels for the trip.  It would have made the night with no electrical hookup much better and would have provided flexibility for other stops.  We now have solar panels for future trips.

We were relying on a small heater and an electric blanket to stay warm as nights were cool.  Solar panels would not enable those options, so for future trips like this, we have purchased a down comforter rated for cold weather.  It would have likely been adequate for this trip.

There is a new earlier post with information on how we typically pack for camping where we consider a long camping trip as well.  Packing for Teardrop Camping-Our Process

The Weather

The weather was quite good considering we were traveling in the last month of winter.  It was pleasant to be outside most days with no more than a lightweight jacket.  We had one rainy day in Austin, Texas, and one cold day in Julian, California, where there was some snow on the ground.    Utah, the most northern part of our trip,  was warm and sunny the entire time we were there.   During the entire trip, typical nights were high 30s and typical days were low 70s.

Our Health

I worried about one or both of us getting sick while in the trip, but we managed to stay healthy.  Last year during this time, I was on my third bout with being sick.  Thankfully, we were well and able to enjoy this trip.

A prescription needed to be filled near the end of the trip, but we use a national drug chain and they filled it just as easily as it would have been at home.

The Tow Vehicle

We drove our SUV an extra 1,000 miles more than the camper because we used it to visit the surrounding areas.  We had no issues towing and our camper was a breeze to pull, even through some quite high elevations. I had worried a little about not having electric brakes, but our camper is very light.

Our tires were almost new, but at one point, my husband noticed that one of the tires appeared to have slung a weight and there was vibration.  We bought the tires from Pep Boys and local dealer in Arizona corrected the issue under warranty.    We also needed an oil change while on the trip, which we had done while in Utah.

Our tow vehicle suffered a minor ding at one of the stops at a very crowded campground while trying to turn around when our way was blocked.  Frustrating, but that’s life.

Tow vehicle

We were always careful to keep at least a half tank of fuel, which was important because fuel opportunities were few and far between in some areas.  We had no problems, but if we had waited until a quarter of a tank, we might have ran out of gas.  Our gas mileage for the entire long camping  trip was 17.4 miles per gallon.  We thought that was pretty good.

Long Camping Trip  Favorites

Our best stop was in Moab, Utah.  The area was absolutely gorgeous and we loved the town and Arches National Park.   We had beautiful weather and a fabulous time at this stop!

Arches National Park

Our favorite campground was Kartchner Caverns State Park in Arizona. The park was beautiful, fairly new, and very well-maintained.  It had all the amenities we needed.  However, for those who prefer to have sewer, it did not have that.

Kartchner Caverns State Park

Surprisingly, our best meal was at Big Texan Steak Ranch in Amarillo, Texas.  The entire meal was delicious at a reasonable price, with a limo that picks you up at your campground.  You have gotta love it!   Here is a link to Big Texan if you would like to check it out.  https://www.bigtexan.com

Other food highlights were apple pie in Julian, green chili cheeseburgers at the Blue Moon Diner on the way to Albuquerque, and fabulous Mexican food at La Posta in Las Cruces and Tacos El Cositas in Yuma.

Big Texan Steak Ranch

There is a post to my blog for all the stops along our long camping trip for anyone interested.

We had a wonderful time!  That said, we were ready to be home near the end.  I think that for us, four weeks is about as long as we should travel, considering we have a tiny camper.

For those new to camping, get out there and take a long camping trip.  Go see some of this beautiful country.  It is so worth the effort!

HapPy Camping!


SW Trip Stop #4, Camping in Del Rio

Del Rio was a stop along the way to Big Bend. We stayed at Broke Mill RV Park and it was excellent!

Del Rio

First of all, Del Rio was a logical stop along our path to Big Bend.  It is a relatively small town, but it offered some entertainment of special interest to my husband and a very nice campground.

Laughlin Heritage Foundation Museum

We try to do something in the local area for each stop on our trip.  Before going to our campground, we visited the Laughlin Heritage Foundation Museum because they closed at 4:00.  It is one of Del Rio’s highly-rated attractions and has a tremendous amount of information about aviation as it pertains to the Del Rio area.  Jim Long, the docent, provided very detailed explanations about the history and artifacts displayed.  Jim is very knowledgeable and seems very dedicated to the work of the museum.

Del Rio played a part in aviation going back to the first transatlantic flight.  Laughlin Air Force Base is nearby, named for Jack Laughlin, a local hero and  B-17 pilot who lost his life in WWII.

We learned that Del Rio was the location for the U-2, the first CIA spy planes.  The museum has a lot of recently de-classified documents.  My big guy is a huge aviation fan and he was enthralled.  Surprisingly, I enjoyed it too.  I learned something major that I did not know.  While Pearl Harbor was being bombed, the Imperial Japanese Air Force were also bombing Singapore and Hong Kong.  I now understand a lot more about the Japanese mindset at the time of the bombings.

The museum is free, but it does accept donations.  However, it is not open every day and has limited hours.  I recommend checking the website before going.

Broke Mill RV Park

We stayed at Broke Mill RV Park and it offered lots of amenities.  We were in need of some creature comforts at that time.   It was unseasonably cold and very windy when we arrived for our one night stopover.  The facility was very clean with the nicest bathhouse we have seen in a long time.  The laundry offered about six each modern washers and dryers.  There was a spacious day room with a television we could use while the clothes were laundering.

Broke Mill RV Park
Broke Mill RV Park in Del Rio

The campground was nice as well and provided good spacing between sites.  Again, we were there one night only and just moved our interior gear outside under a tarp.  We only hooked up the electricity and cable.

Campground at Broke Mill RV
Campground
Dayroon at Broke Mill RV Park
Dayroom

The campground offered very good cable reception and also a fair number of channels.  During office hours, the campground sells grass-fed beef, so it would be a great place to get a fresh steak to grill.  As a result of the many amenities, I highly recommend this very well-maintained campground.

https://brokemillrvpark.com

Next stop, Big Bend National Forest!

Retired couple


Jensen TV and DVD Player—Basic Use

This is a very basic guide for first-time users. The Jensen TV and DVD player work much like what you have at home. The biggest difference is that you must scan for channels when you move to a different location.

Our Jensen TV

Our T@G teardrop camper, which we purchased a year ago, came equipped with a Jensen TV and DVD player.  We have used it, in some fashion, on every trip we have taken.  However,  we are not experts.  I know that some campers have very sophisticated equipment and powerful antennas and that is not us.

I am writing this post because I occasionally see questions about this topic.  Also, I try to think about what I would like to have had as a resource when we began camping.  If this is too basic, I apologize.

TV Input

The input for reception is located near the water and electrical outlet on the camper.  It is the open circular receptacle at the top left and is used for both cable and antenna input.

Cable/antenna input

Step 1, Antenna

For television viewing, the first step is to connect to a source for reception.

Much of our camping has been in State Parks or U.S. Corps of Engineers campgrounds where cable is often not provided.   However, it has been my experience to find cable in commercial campgrounds.  The set up for cable and air antennas is similar.

For cable, you need to have your own cable to attach to the campground cable block.  It is generally found on the power pedestal. Your cable links the campground cable source to the cable receptor on your camper.

If no cable is provided, you can use a variety of air antennas.  We purchased one at our RV dealership.  It was over a hundred dollars, bulky, and did not work any better than one my husband devised.  It is based on one he saw on one of the Facebook camping groups.  A photo of it,which I used for this demonstration is below.

Air antenna

Step 2, Jensen TV Input

Next, the input for the TV should be set to “TV”.  This can be done by selecting source on your remote or the source button on the bottom of your TV.

You are now ready to scan for available channels.  Select menu on the Jensen remote or by press the menu button on the bottom of the TV to do this.

Jensen Menu Screen

Step 3

  • Use the right arrow on the remote to highlight “Channel” and press enter to select it.
  • Arrow down to “Air/Cable” and select the option you need.  The photo above shows air, but you can also select cable in the top line.  Once you have selected the appropriate option, arrow down and hit enter to begin “Auto Scan”.
Channel scan in progress

We did the scan for this demonstration in our basement and found nine channels.  Once the scan ends, the first channel that was found is tuned to your television.   As you can see from the photo below, the reception was not bad.

Jensen TV
One of the available channels

As long as you remain in the same location, you will have access to the channels identified in the scan,  even after turning off the TV.  When you move to a new campsite, you will have to perform the scan function again.

Jensen TV and DVD Basics

We often would rather watch movies than regular television.  We either pick up Redbox movies or bring movies from home.

Jensen DVD
  • We were sad to learn that our player does not play Blue Ray and our newer movies at home are Blue Ray.  Be sure that you rent or bring regular DVDs if you do not have a Blue Ray player.
  • Set the input to AV to play a DVD.
  • A positive aspect with DVDs, is that you are able to use the speakers installed in the cabin.
  • A special Jensen Remote is required for DVD operation.
  • The DVD player will play music via Bluetooth.  I have music on my phone and it works well with the player.
  • AM\FM is available on the player.
  • There is also a clock and an alarm, but we have never used it.

Apple TV

We sometimes watch Netflix on Apple TV.  Apple TV also connects to other options, such as HULU.

  • We connect the Apple cable to the HDMI plug on the back of the TV.
  • To watch Apple TV, you must be connected to a network.    We use the hotspot on our phone for the network.  Don’t do this if you don’t have available data as overages can be costly.  We increased our data package recently, so this is an available option.
  • Set the input source on the TV to HDMI.
  • You must have the Apple remote as well.

Input Source

Below is a photo of the input options.  We have not used all of them, but I will summarize the ones we currently use.

  • TV, for cable or air antenna television viewing
  • AV, for DVD viewing
  • HDMI, for Apple TV, when plugged into HDMI receptacle on TV
Henson input options

Remotes

Below is a photo of  Jensen TV remote and the DVD remote.   For us, Apple TV brings a third remote.  It can be a bit much, but we do like to be entertained.

Jensen remotes

Jenson TV Support

Below is a link to Jenson RV Direct.  It could be handy to have if you need additional information or if you have any issues with your Jensen TV.

http://jensenrvdirect.com

We received information on the operation of our camper at the time of purchase. Also, they briefly covered the Jensen TV.   However, a month later in our first trip out, we were a little fuzzy on what to do with the TV.  First Camping Trip     We managed to get things going, but there was some trial and error.   I hope this post is helpful to new campers.

In Conclusion

If you would like to read about other things we have learned during our camping adventures, we now have a resources page for new campers.  Also, we recently dropped our cable services at home and purchased Roku devices for streaming.  Our monthly cable costs were $114, but now the streaming costs are $40, a savings of $74.  So, if you are interested in converting to streaming, check out our post Cable Cutting, A Retirement Cost Savings Strategy

Update

Would you like to be able to watch shows and movies on your television when in remote areas with no cell or Internet service.  If yes, check out my latest post, How to Use Your Phone to Watch TV.  The input source would be HDMI for this option.

Happy Camping!


Hello world!

My husband and I are newly retired. We have never really been campers, but have purchased a T@G MAX XL camper as an economical way to travel and see this beautiful country. My husband is 6’3″ and the camper is a teardrop, hence the name of my blog. We hope you will follow our adventures!

I have have worked full-time for the last thirty-six years and was quite concerned about how I would fill my time in retirement.  I do not have it all figured out, but teardrop camping is a pretty big piece of the puzzle.  Camping in a teardrop allows us to travel just about as often as we wish,  the blog is a technology challenge, and the writing is a bit of a creative outlet.

Also, everything you need to know for this kind of travel has a learning curve.  We hope to share what we learn to help other new campers and to provide useful information about the places we visit.

Most posts will be about camping as it will be our most frequent mode of travel, but there will also be road trips and posts about retirement in general.

We hope you will follow along in our adventures!

dsc_00501