T@B 400 Modification and Third Year Camping

T@B 400 Modification

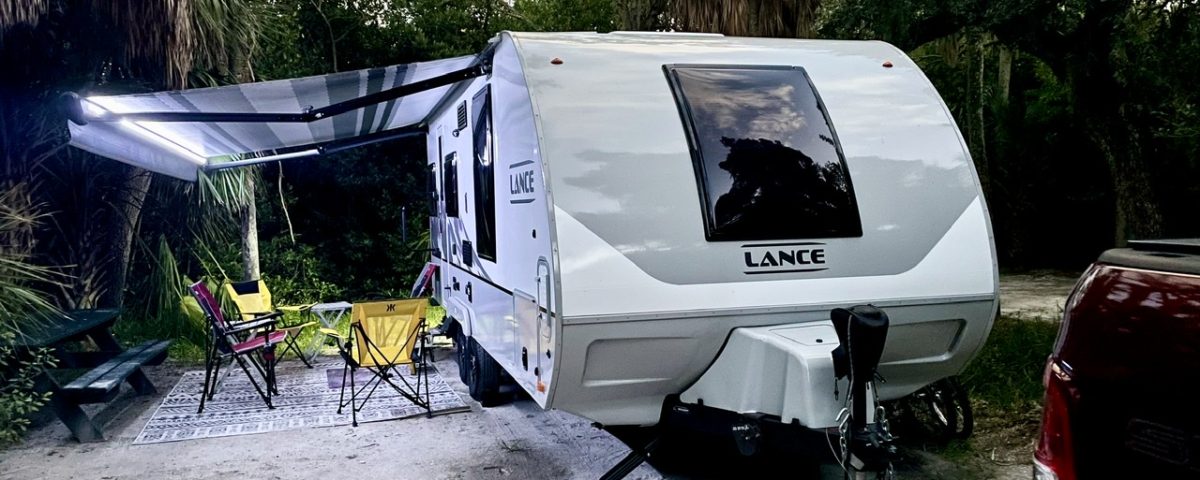
We began our third year of camping with a nüCamp T@B 400 Boondock Lite and we love it!  I have provided a link to the NüCamp T@B 400.  It is fantastic camper, as was our previous nüCamp product, a T@G MAX XL.   The 400 was designed with a lot of input from owners.  Consequently,  we did not need much in the way of T@B 400 modification.  We only made a few changes and most were in the front storage compartment.

Lever on Storage Compartment

My husband saw a Storage compartment lever on a later 400 model that was not on ours.  It holds the lid open with a shock.   We obtained the part at ùCamp 19 and my husband installed it.  It makes it much easier to use the storage compartment.

400 modification Lever for Storage Lid
Storage Compartment Lever

Enclosed Back of Compartment

The front storage compartment was totally open on the back, which could allow small items to slip through.  We don’t carry a lot of small items in there, but wanted the option to do so.  My husband added a piece of metal with holes throughout so the area would be ventilated.

400 Modification Back Panel
Back Panel for Storage Compartment

400 Modification, 2nd Propane Tank

For future boondocking, we wanted an additional propane tank, especially since our storage compartment is large enough hold it.   We had our dealer, Bankston, add the tank and holder while our camper was there for a replacement to a window shade.

400 Modification Extra Propane Tank
Extra Propane Tank

400 Modification-Zamp Connector

We purchased a Zamp Solar Suitcase when we had our T@G.  However, the T@B 400 does not come with a Zamp connection.  Because we hope to do more boondocking using the Zamp, my husband installed the connection.  I was very worried about putting a hole in our brand new camper, but he did an amazing job.   We have a separate post with step-by-step photos on how he did it:  Zamp Connector Added to our New Camper.

Zamp Connector
Zamp Connector

New United States Map

We attached our previous United States map to our T@G and we sold it last year.  So, we bought a new one just like our old one and filled in the states in which we have camped in both of our campers.  Somehow, I find it gratifying  filling in that map.

States visited
States Visited by Year Three

Camper Name

Our new camper has the same name as our first camper.  The T@G was named Endeavor, so the 400 became Endeavor II.  The T@G’s name was on the back , but that did not work with the 400.  We settled on the front of the 400 for the name and I think it looks pretty good.

I ordered the letters from DIY Lettering . It was easy to install and only $25.   We also added the blog’s URL in smaller letters on the side of the camper for $24.

400 Modification, Endeavor II
Endeavor II
Blog URL
Blog URL

400 Modification Not Done

In life, you can’t have everything.  We wanted the platform that we see on many T@Gs and T@Bs because it is really nice for storage.  I asked the experts at nüCamp about adding it to our 400 while we were in Ohio.  Sadly, they did not recommend adding the platform to our model despite the fact that our vehicle can handle a tongue weight of 900 pounds.

We can’t install the platform because our air conditioner is at the front of our camper, which could make the tongue weight too heavy relative to the overall weight of the camper if we added much weight on the platform.   The air conditioner for the 2020 model 400 was moved to the back of the camper and it allows the platform to be added.  The tongue weight of our 2019 model is 465, while the 2020 model is only 372 pounds.

Warranty Replacement

This was not a modification, but it is something altered on our camper.  The shade on our front window became somewhat difficult to close soon after we bought the camper.  It bunched up in one side at the bottom.  It would only close correctly if done very slowly.

Our dealer, Bankston RV, confirmed that our shade had some issues and a different one was currently being used.  Bankston ordered the replacement and installed it.   It lowers much easier now.  However, because the shade is so large and we want to keep the folds crisp, we keep it down when in our storage facility.

Camping Trips

All of our trips were in our new T@B 400 for this third year of camping.  We took five trips and traveled 5,988 miles for a total of 63 nights in the camper.  One trip was quite long with 35 nights and we took two trips each at ten and four nights.  All our camping was with groups except the trips to new states.  This was great because we really like camping with friends.

We have a  goal to camp in all fifty states.  I am happy to say that we added six new states this year to our map:  North Carolina, South Carolina, Virginia, West Virginia, Delaware, and Maryland.   Additionally, we camped in Alabama, Georgia, Ohio, and Florida, though not for the first time.  Can you tell I was an accountant?

Now Camping Year 4 Begins!
Retired couple


Winterized our Camper Water System

Winterized our Camper, Twice

We winterized our camper just a couple of days after we purchased it because the local temperature was dipping into the twenties.  This resulted in scrambling to read manuals and watch YouTube videos.  The camper was taken on its maiden trip a few days after.   Having now winterized the camper twice, once when we first brought it home and again when we returned from a nine day trip, we feel we have a handle on it.

We are by no means experts in camper winterization, but believe our process will be adequate to protect it.  We hope this post will be helpful to others new to this process.   

Winterization Preparation 

We purchased RV antifreeze and a suction tube that attaches to the water pump at our local RV dealer.   The combo of hose and gallon of antifreeze was $12.99.  There’s also a kit on Amazon that includes the tube plus a few items we did not use.  

For our method, we only used one gallon of RV antifreeze, the kind that is non-toxic.  It is very important to only use RV antifreeze because you are dealing with your water system.

We turned off our Alde heating system before beginning the process.  We previously dumped our gray and black tanks at the campground.  As we had fresh water in our holding tank,  I ran a good bit of water into the sink and flushed the toilet several times to run fresh water through the tanks.  If connected to city water, you would want to disconnect after running some fresh water through the system.

Draining the System 

Before draining,  be sure that your camper is level from front to back and also right to left to ensure that everything drains properly. 

 1. Drain the fresh water tank.

The valve is located behind the wheel on the driver’s side.  It holds 30 gallons, so be sure to allow plenty of time for it  to drain.  It drains best when the camper is level.  

Drain Fresh Water Tank and winterized our camper
Fresh Water Tank Valve

2.  Flush Water Lines:   

After the fresh water tank is completely drained,  turn on the water pump and open each hot and cold water faucet.  Close each faucet when water stops.  Next, flush the toilet till no water flows.

3.  Low Point and Water Heater Drains:  

Open the two low point drains and the hot water heater drains.  They can be accessed through the rear compartment on the driver’s side.   The drains are located where the green circles are below.


Access area for drains

The low point drains are perpendicular when closed and parallel when open. They are open in the photo below.

Low point drains are open

The water heater drains are pointing up when open and are pointing forward when closed.  The Alde 3020 Manual recommends having all water taps open to drain the hot water tank.   It also recommends leaving the valves open during winterization.  Below is the page from the manual.

Alde drain information


Hot water drains are open

Allow all the water to flow out of the low point and water heater drains,  then close them.  When closed, they should look like the photo below.

Closed low point drains
4.  Drain the Holding Tanks:

I am assuming that the tanks were drained after the last camping trip, so you will only be draining the little bit of freshwater that was in the water lines.

Drained black and gray lines
Black and gray valves are opened and drained

5. Bypass the Hot Water Heater

Change the Bypass valve for the hot water system from “Normal” to “Bypass”.   We do this to prevent antifreeze from getting into the hot water system.  It should remain in this position until the camper is dewinterized and ready to be used again.

Bypass valve set to bypass

6.  Add the Antifreeze:

Turn on the pump for a couple of minutes because you want to get any water that might remain out and turn on a faucet to release it.

You are now ready to pump antifreeze into the water system using the pump, which is accessible through the wardrobe inside the camper.  

Water pump access point

Below is a photo of what we attached to the pump.  We removed the waterline that was going into the pump and attached the black  1/2” fitting below.  We then inserted the tubing into the antifreeze container.

Winterized our camper using this
Tubing and connector for water pump

Below is a photo of how it looked while attached.

Winterized our camper
Attached Pump device

Next, we ran the pump, which sucked the antifreeze into the water system.  While the pump was running, we turned on each faucet until we saw pink antifreeze coming out of it.   This included both hot and cold faucets in both sinks and the shower.  We also did this for the toilet and for the hot and cold faucets for the outside shower.

We have winterized our camper
Antifreeze has flowed into the sink

We used about 3/4 of a gallon of antifreeze through the pump.  Next, we  poured the remaining amount into the 2 sinks, shower floor,  and toilet.  

Winterized Our Camper:

We have now winterized our camper water system!  I will be following up later with a post on how we dewinterize to get ready to go camping.

Alternate Methods:

1)  Antifreeze into Fresh Water Tank

I have read that if you do not want to pump antifreeze directly into your system, you can use the fresh water system instead.   First, drain all possible water and then add approximately 3 gallons antifreeze directly into the fresh water tank.  Next, turn on the pump and open all faucets until the pink antifreeze is coming through.  You would also pour antifreeze into the drains (#7 above).

2) Blowout Method:

This process requires the following:

  • A a special adapter to attach to the city water inlet.
  • A regulated air compressor to blow the water out of the system.  The PSI should be set to no more than 30 PSI.
Blowout Air Valve
Air valve for blowout method

We recently used this method for a few freezing nights before going camping.  

All the drainage steps (1-5)  above would be used, except the drains and faucets would be left open for the blowout process.  They would then be closed and a total of approximately one gallon of antifreeze poured down the sink and shower drains and toilet.   There are also instructions on the web and YouTube for this method.

Winterized Our Camper Conclusion 

The steps above are just to prepare the water system for winter.    I have reviewed the manual and know there are other things we must do before we can put our camper safely away for winter.  

We never winterized our T@G camper because it slept in our basement when not on the road.  I was pretty comfortable with how to manage camping in our T@G and all that it entails.  Now, there is a new, more complicated camper to understand.   How we winterized our camper has been added to our  Camping Resources for New Teardrop Campers.

Looking forward to warmer weather and new camping adventures!

Retired couple


üCamp 18, Rally of the Tinys in Sugarcreek

üCamp 18

The second üCamp rally was held in July 2018 in Sugarcreek, Ohio, at Winklepleck Grove Campground.  Approximately 160 sites were filled with tiny trailers from all over the United States and Canada.  The largest number of campers represented was the T@B 320, but there were also at least twenty each T@B 400s and T@Gs.  We own a T@G MAX XL and were excited to see so many other tiny campers.

Teardrop camper at Winklepeck Grove Campground
Site 1B, Winklepeck Grove Campground

Winklepeck Grove Campground

Winklepeck is a primitive campground in a large shady grove.   It is beautiful, but does not have flush toilets or showers.  However,  nüCamp brought in two shower trailers and a large number of VIP portable toilets.   The  portable toilets were okay until the last day before they pumped them.  So we were going into town and using the public restrooms near the fire station on that day.

The campground split the electricity among two campers for each site and it split the water as well.  However, we had all that we needed, including running the air conditioner and microwave.

Winklepeck Grove Campground

Rally Activities

There were many fun things to do during the rally, but it seemed that everyone’s favorite was to walk the campground and meet fellow nüCamp trailer owners.  Also, it was cool to talk with those who had the same size camper and see their modifications and how they were using theirs.  Lastly, it was nice to see the larger models and maybe even consider an upgrade.

Several meals were provided, plus great entertainment the last night featuring two local sisters called Kodachrome Babies.  They were very good and sang some amazing oldies.

üCamp Rally Schedule
Rally Schedule

Tent with people
Some meals and events under the big tent

üCamp food
Wine and cheese night

Factory Tour

The highlight of the trip was the tour of the factory so we could see how these tiny trailers are made.

nüCamp Factory
nüCamp Factory

The factory is in the heart of Amish country and many of the employees are Amish.  The quality of the work is evident and well-recognized within the industry.

Amish Buggies
Amish Buggies at the last night’s dinner

Scott Hubble, nüCamp CEO

nüCamp Assembly Line
Assembly line for T@Gs

nüCamp Completed Trailers
Ready for Delivery

We were on the second tour.  Scott Hubble, the CEO, gave a presentation at the beginning of the tour about the history of the company and its current initiatives.  He then answered questions.   After his presentation, he turned everyone loose to explore the facility.  Our friends told us that Joe Mullet, the founder  and President of the company,  gave the first tour.  They said he shared about his personal struggles at the beginning of the company.

The factory was  immaculate and seemed very well organized.  We left with an even stronger impression that this organization really cares about its customers and making a quality product.

Conclusion

In my opinion, üCamp 18 was a huge success.  It was a well-organized and a thoroughly enjoyable event.  We were sad to leave this wonderful gathering of tiny camper owners.   Many had commented to us that this trip was the highlight of their year and I would have to agree.

Sunset over Winklepeck
Sunset at Winklepeck

Mandy Lea is a well-known photographer who has lived in several nüCamp trailers and has produced YouTube videos about them.  She presented the large panoramic picture below to the Company’s leadership on the last night and had some beautiful things to say about them.

Mandy Lea’s gift to nüCamp

So we loved üCamp 18 and hope to be there again next year!  If you would like to follow us, here  is a link.

Happy Camping

Retired couple