Carrots are this week’s Good Friends Good Food vegetable. I love them because they are so versatile. This recipe is a favorite way to prepare them for me. Though this is certainly a carrot dish, the caramelized onions are what makes it special.
It does take some time to prepare this side dish because the onions have to cook slowly to caramelize. However, it is quick and easy to assemble. While it has to cook close to an hour, it just requires stirring occasionally.
Carrots and onions simmering
Carrots with Caramelized Onions Recipe
Ingredients
1/2 tsp Salt
1/4 tsp Pepper
1/4 tsp Fennel Seeds
3 Tbsp Butter
2 Large Onions, peeled, cut into six pieces with stem end intact (approx 2 c.)
Carrots, peeled and cut into 2 inch pieces, 16 oz.
1 Tbsp Fresh Parsley, chopped
Directions
Firstly, combine salt, pepper, and seeds in a small bowl. In large, non-stick skillet, melt 2 Tbsp butter. Add onions and half of salt mixture. Reduce heat to medium-low and cook, stirring occasionally, until onions are golden, about 30-35 minutes. Add carrots and remaining butter and salt mixture. Cook, stirring occasionally, until carrots are softened and golden, about 20 minutes. Remove from heat. Lastly, stir in parsley and serve.
Good Friends Good Food
Be sure to also check out what other members of our cooking group have prepared this week. Below are links to their blogs.
It so happens that this recipe rolls out on the first day of 2021, a brand new year! Because 2020 was very challenging, I think just about everyone hopes that the new year brings a reset to better times. Wishing you and your family a happy, healthy, and prosperous New Year!
Our year four of retirement began better than most of my adult life. In January and February we took two distinctly different trips, both of which were wonderful.
Phoenix
We were fortunate in January to spend several days in Phoenix, Phoenix, A Winter Getaway in the Desert. It was a outstanding winter trip! The weather was dry and warm and we were well entertained by local sights including the Arizona Capital Museum, Desert Botanical Garden, Japanese Friendship Garden, and Phoenix Art Museum. Our hotel, The Hilton, was in the heart of downtown and near some incredible restaurants. Our meals on this trip were outstanding, better than most of our travels.
However, we did not exclusively stay in the city. One day, we took the Metro to Scottsdale and on another an Uber to Taliesin West, Frank Lloyd Wright’s winter home. I highly recommended both.
Downtown Scottsdale
Camping in Florida
For almost a year, we’ve had a winter trip planned along Florida’s coastline, with most stops at state parks. We met friends at several of the campgrounds, which greatly enhanced our trip. Highlights of our trip were Topsail State Park, the Florida Keys, and Everglades National Park. This was truly a dream trip!
Enjoying the beach at Topsail State ParkBiking at Collier Seminole State ParkThe beautiful Florida KeysEverglades National Park
COVID-19
Just after our winter travel, it became known that COVID-19 was a serious thing. Undoubtedly, 2020 will go down in infamy for its devastating impacts. It was horrific for many families with loss of life and livelihood. Some survived, but with lasting impacts to health. We actively strived to avoid exposure to the virus and it appears we have succeeded. The promise of a vaccine in a few months does much to brighten our hopes for next year.
Quarantine Activities
We spent much more time at home this year than our other retirement years. So, there was the search for things to keep me entertained and engaged. My husband is more comfortable than I just puttering around.
Sewing
I entertained myself by dusting off my limited 40 year-old sewing skills on a used machine I bought from a friend. I made many masks and altered a few of my clothes. It is good to have a working sewing machine again.
Masks are the new normal
Painting
Paint by Number kits helped me while away many hours and I found the painting to be quite relaxing. After completing one kit, I ordered a custom one using a personal photo. I think we are recognizable in the painting below.
Custom Paint By Number
My husband actually painted a kit too, but he was far more freestyle than I. I believe he has more actual talent.
My Husband’s Painting
Exercise
Lastly, as a person who had a regular routine at our local gym, I needed a way to continue my exercise. We had purchased a stationary bike before the pandemic and it helped immensely. However, a major part of my exercise regimen was Body Pump classes with weights. Just using hand weights was not doing it for me. I learned that Les Mills classes, including Body Pump, was available by subscription. So, I ordered weights and a bench and could do those classes I loved at home. I do miss seeing my friends at the gym though.
My exercise room upstairs
Pandemic Camping
When the pandemic lessened during the summer, we took several camping trips. The breaks really made it easier getting through the isolation. We felt that camping was relatively safe because we were social distancing.
The Midwest
We took an amazing five-week trip to the Midwest in the summer, Midwest Camping in a Pandemic. It was different camping for us however. We like to eat out a lot while camping. This trip we had a few outdoor meals that were great, but so many were in our car or camper. Museums and libraries that we would normally visit were closed, but we did get to visit the Lincoln Library. Masks and a reservation were required to limit the number of people. We also visited parks and gardens, which greatly enhanced our trip.
The Lincoln LibraryPappajohn Sculpture ParkNational World War I MuseumOur amazing lunch at Jack Stack in Kansas City
Camping With Friends
We met some friends at Myrtle Beach, Pandemic Camping with Friends .
It was a wonderful time, but the weather could have been better. A couple of days were sunny, but there was a lot of wind and rain.
Ocean Lakes Campground at Myrtle Beach
We also met our SE T@B group for a couple of short trips, one at Vogel State Park and the other at Fort Mountain. While we made these two trips, we cancelled three others because the weather was colder and virus cases increased dramatically.
Camping at Vogel State Park
Family During Year Four of Retirement
Sadly, our time with family suffered during the pandemic. We were fortunate to spend several weeks with our son and his wife who stayed with us, but didn’t see the rest of the family very much. The photo below is our granddaughters and one of their friends who visited us once. Our visits with family members were mostly outdoors or limited time inside with masks. There were no birthday parties nor holidays gatherings. A very strange year indeed!
Visiting with grandchildren
We ventured out to a local restaurant for my husband’s birthday. It was a bit hot, but felt luxurious.
Birthday Lunch at Mugshots
Health
My lung issues escalated this year. This meant many rounds of antibiotics and steroids, plus a cough has not gone away. At one point, my doctor was recommending a hospital visit. I managed to stay home though. Using a nebulizer daily has become a part of my routine. I am happy that it has not prevented me from doing most things I enjoy and am grateful for that.
Using a nebulizer daily
I am delighted to say that my husband’s health has been good! The knee replacement is all healed and he is doing better than when we first retired.
Year Four Retirement and a New Family Member
We have considered getting a puppy for awhile, but were concerned it would limit our travel. It is still a concern, but we took the plunge. We picked up Sophie a week before Christmas. She is such a sweet pup, but despite our research, far more work than we realized. We are committed though to getting through the puppy stage.
Sophie, Our New Goldendoodle
In Conclusion
We were truly blessed this year, especially knowing that so many have died or suffered greatly with the virus. The economic toll that has been experienced by a large portion of our population is also heartbreaking. I hope that we can come together in 2021— physically and emotionally. Wishing everyone a wonderful New Year!
We are well into the Christmas season and Good Friends Good Food is cooking anything from the category of holiday green vegetables this week. So, I chose broccoli salad.
I have been making various versions of this broccoli salad during the holidays for many years. It is chocked full of vegetables and is not super rich. I like it because it offsets some of the very rich food that I typically serve during the holidays. However, it doesn’t appear often in our house. Therefore, it is usually a special occasion when we have it.
The recipe’s origin goes back to a popular restaurant in Birmingham many years ago, The Wild Root. The recipe appeared in the newspaper along with a picture of a friend who worked there. This version is different because I have been progressively changing it to reduce calories. If interested in something closer to the original recipe, simply increase the ratio of the dressing to the vegetables.
This is a super easy and quick dish to prepare. The vegetables are chopped and combined in one bowl. Similarly, the remaining ingredients are combined as a dressing. After that, the contents to both bowls are combined.
Vegetables for broccoli salad
Recipe
Ingredients
4 c. Fresh Broccoli, chopped
1/2 c. Crasins
1 c. Water Chestnuts, chopped
1/2 c. Red Onion, chopped
3/4 c. Cheddar Cheese, shredded
3/4 c. Mayonnaise
2 Tbsp Balsamic Vinegar
2 Tbsp Sugar
Salt and Pepper to taste
1 Garlic Clove, minced
Directions
Firstly, combine broccoli, crasins, water chestnuts, and onion in a bowl. Secondly, combine remaining ingredients in a small bowl to make a dressing. Lastly, combine the dressing mixture with broccoli mixture.
This Version
Because I am making this dish for the cooking group, we had it for a regular weekday dinner. It was crispy and delicious! However, I am sad to say that we both ate too much. Perhaps it is because the dish is a holiday tradition where overeating is the norm.
Broccoli Salad
Above all, please check out other delicious recipes from Good Friends Good Food. Also, see my page Vegetables with Good Friends, Good Food and you will see links to other vegetables.
In conclusion, the next vegetable Good Friends Good Food is cooking is carrots. I’m sure there will be some creative offerings by those outstanding cooks.
I wish you and your family a very Merry Christmas and the happiest New Year!
Cabbage is the vegetable Good Friends Good Food cooked this past week. Lately, the only thing I do with cabbage is coleslaw. But, that would not do for this post. So, I pulled out a blast from the past, Stuffed Cabbage. It is a dish that I made when my children were young and I did a lot of cooking. My husband and I have been married over thirty years and I don’t think I have ever cooked the dish for him.
Preparing Stuffed Cabbage
Most importantly, this dish doesn’t require special ingredients. For instance, I have everything except the cabbage on hand most of the time.
Ingredients for Stuffed Cabbage
This is really a simple and easy dish to prepare. However, two things prevent it from being in my typical rotation. Firstly, while quick to assemble, it has to bake for a long time. However, this can be overcome by planning. Secondly, I am not crazy about pulling apart the cabbage leaves. I am not a fan. Despite the aggravation of the leaves, this is a good dish.
Recipe for Stuffed Cabbage
Ingredients
1 lb. Ground Chuck
Large Head of Cabbage
1/2 c. Rice
Small Onion, Grated
2 Eggs, beaten
1 tsp Salt
1/4 tsp Pepper
Large Onion, sliced
Large Can Tomatoes, 29 oz (I prefer whole Tomatoes)
Tomato Sauce, 8 oz.
Juice of 1 Lemon
1 tsp Salt
1/4 tsp Pepper
1/2 c. Brown Sugar
Directions
Firstly, preheat oven to 375 degrees.
Heat a large pan of water to boiling. Core cabbage and separate 12 of the leaves. Cook leaves in boiling water until barely tender. (Trim thick part from leaves.)
Meanwhile, combine in a medium bowl the meat, rice, grated onion, eggs, and first salt and pepper that is listed. Divide mixture among the leaves so that each leaf has mixture that is slightly larger than a large egg. After that, wrap each leaf around the mixture and place in a large baking pan or Dutch Oven with seam side down.
Pour tomatoes over all. After that, add tomato sauce, lemon juice, and onions. Lastly, sprinkle second salt and pepper and the brown sugar evenly over all.
Bake, covered, for 2 hours.
Ready to bake
My Stuffed Cabbage Result
We certainly enjoyed this dish. My husband really loved it and said that I can feed it to him any old time. The long baking time gives a full, rich flavor to the onions and tomatoes. Also, it makes a lot and the leftovers are every bit as good as they were the first day.
Stuffed Cabbage
Good Friends Good Food
Most importantly, if you like cabbage and are looking for other recipes, click on the links below. Also, check out my page, Vegetables with Good Friends, Good Food to see links to other vegetables the group has cooked.
In conclusion, holiday green vegetables will be up next for Good Friends Good Food. I certainly can’t wait to see what these talented ladies do with that option.
Cauliflower is the latest featured vegetable in the Good Friends Good Food group. I made my dish with cheese sauce because it is a favorite of my husband’s. It is also a real comfort food that requires just a few ingredients.
My recipe includes instructions for cooking in an Instant Pot, but it can easily be cooked on the stove top as well. Just cook until tender crisp in salted water and drain well.
Recipe In My Recipe Book
I mentioned that this is a frequent dish in our home. This recipe and all of my favorite recipes are loaded in Family Cookbook Project.
A couple of years ago, I entered all of my favorite recipes into the web application and had several copies of my cookbook printed. Then, I gave one of the books to each of our daughters and older granddaughters. Our daughters have requested a cookbook over the years and retirement afforded the time to make it happen.
My Recipe Book
Most importantly, I have loved having electronic versions of my favorite recipes all in one spot. Also, as new favored recipes have emerged, I added them to the book. Nowadays, if I decide to make a specific dish while grocery shopping, I can pull it up on line to see my list of ingredients. Our daughters have also used the electronic version to look up recipes. Lastly, the cookbook has a nice feature that allows you can search for a specific recipe on a keyword. Below is a screenshot of my cauliflower recipe.
Cauliflower with Cheese
Good Friends Good Food
Please also check out the links below for other Good Friends Good Food recipes. These ladies are excellent cooks!
It’s autumn and time for pumpkin to take center stage. Pumpkin is also the Good Friends Good Food Cooking Group’s vegetable for this week. My choice shifted between a favorite pumpkin soup and a pumpkin cheesecake, which would be a new dessert for me. Pumpkin cheesecake is one of those seasonal dishes that I love. Because I have also been wanting to try a cheesecake in my Instant Pot, now seemed a good time.
If the Instant Pot is not your thing, I believe this recipe would work fine in an oven with close watching near the end to get to the appropriate degree of doneness.
Instant Pot Utensils
I used my six quart Instant Pot and a 7” springform pan. When I first bought the Instant Pot, I invested in a couple of pans to use inside it. This is my first use of the springform pan. It fits perfectly inside the pot and on top of the trivet.
Special Instant Pot Considerations
I did some research on Instant Pot cheesecakes and the following things should be a part of the process.
The ingredients should be at room temperature when used because it important for the consistency of the top of the cheesecake.
Bring the water to boiling in the pot before cooking the cheesecake because it reduces the steam in the pot by bringing up the pressure more quickly.
Do not overmix the ingredients and it will help prevent a puffy soufflé-style cheesecake.
Cover the top and bottom of the pan with foil because it keeps the steam off the cheesecake. It is also important for the cooking time to be accurate.
Freeze the prepared crust while mixing the filling. (Or bake in 325 degree oven for 15 minutes.)
Wrapped Springform Pan
Pumpkin Cheesecake Recipe
Ingredients
12 oz. Cream Cheese (1 1/2 blocks), softened
1 can (14 oz) Sweetened Condensed Milk
2 Tbsp Corn Starch
1 tsp Pumpkin Pie Spice
1/4 tsp Cardamom
2 Large Eggs, slightly beaten
1 c. Pumpkin Purée
1 1/2 c. Water in Instant Pot
Crust
1 c. Ginger Snap Crumbs or Graham Cracker Crumbs
2 Tbsp Granulated Sugar
2 Tbsp Salted Butter, melted
Whipped Cream for topping
Instructions
Remove eggs and cream cheese from refrigerator about an hour before preparation to bring to room temperature.
Prepare a 7” springform pan by lining the bottom with wax or parchment paper. Grease the sides with butter.
First, prepare the crust. Mix together the crumbs, sugar, and butter and press into the prepared pan. Place the pan into the freezer or bake in a 325-degree oven while preparing the filling.
In a large bowl, stir the cream cheese and ensure it is very soft. Add the condensed milk and stir with a whisk until smooth. Stir together the flour and spices and then add to mixture. Lastly, add the pumpkin and eggs and stir until blended.
Pour filling over the crust evenly and tap the pan lightly on the counter to release air bubbles. Next, cover the pan with foil on both the bottom and top to prevent condensation getting to the cheesecake.
Add the water to the Instant Pot and turn on Sauté. Heat until the water is boiling and then turn off the sauté function. Put the springform pan inside the trivet and lower the foil-covered pan into the pot.
Place the cover on and set for pressure cooking on high for 49 minutes. After cooking, allow 20 minutes for a natural release.
Remove foil cover and examine cheesecake. There should be a slight jiggle in the center. If the center looks like liquid, cover and cook for an additional 5 minutes and 5 minutes natural release. If there is any condensation on the cheesecake, dab with a paper towel to remove.
Serving Instructions
Remove all the foil and allow the cheesecake to cool on the counter for 1.5 hours. Lastly, cover the pan and refrigerate for at least 10 hours before serving.
Springform pan in Instant Pot
Carefully remove the cheesecake from the pan and remove the wax paper. Serve with whipped cream. Voila, pumpkin cheesecake!
My Result
So, the center of my cheesecake was a little jiggly as desired. I found the center to be a little more creamy than the edges, but all of it was good. It was also easy to get out of the pan. However, this is not an overly sweet cheesecake. Surprisingly, my husband, a big sugar fan, loved it! I think he liked it more than me. The cardamom was one of my modifications, which I liked.
This opens our world of camping to cheesecake because we usually take the instant pot, but not an oven. It is a little different process, but is not really difficult.
Pumpkin cheesecake
In conclusion
I am enjoying cooking with Good Friends Good Food group. Check out my page, Vegetables with Good Friends, Good Food and our recipes for other vegetables. I am so looking forward to all the creative ways pumpkin is used by members of the group. Lastly, be sure to click on their links.
I wrote this unhitching and setup post exclusively for new campers. Experienced campers have already figured this stuff out and could possibly share better methods. When we first began camping, we did not know anything at all about campers and how to use them. I would have appreciated a post like this. However, I could not find anything this basic and detailed.
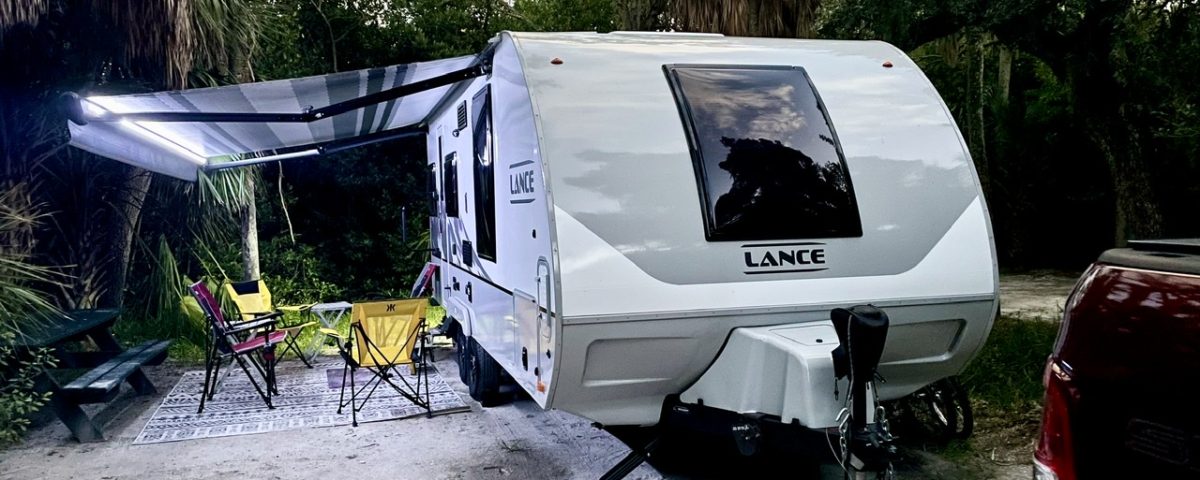
We have now been camping for four years and this post reflects what we have learned and is how we setup our current camper, a nüCamp T@B 400.
New Camper Unhitching and Setup
The Order of Things
Some steps must be done in a specific order or must precede other steps. Others can occur anywhere in the process. In this post, I will always indicate when order is important and why. Lastly, we have found that a standard practice makes our process more efficient and less prone to errors. You develop a sort of muscle memory.
Level the Side-to-Side
This first step is essential if you have an unlevel site from side-to-side. You should perform this check before other steps because the trailer must be hitched to raise one of the wheels. So, I use a small level that we keep in the camper to see if the the side to side is level. If it is not level, we have two leveling pads that we drive the wheel over on the low side. Often, we do not need these pads for leveling. Sometimes, we need both pads and occasionally only one is needed.
Checking the side to side level statusLeveling pads
It is important that the camper is level for the refrigerator and air conditioner to work properly and for accurate reading of tank levels. Lastly, it is much more comfortable in a leveled camper.
Chock the Wheels
For safety, it is important to chock the wheels before any steps in the unhitching process begins. An unchocked camper can roll and cause damages and possible injuries. So, it is just a good practice to always do this before unhitching.
Chocked wheel
Insert Wheel or Block
We currently use a block to unhitch and stabilize the front of our camper. For maximum stability, we center it and lower the jack. In our previous camper, we used a wheel. However, we prefer the block.
Jack is supported by block
Remove 7-Pin Connector
You should remove the 7-pin connector before unhitching to prevent drain on the car battery and to get it out of the way of the hitch.
Remove the Chains and Breakaway Cable
You will want to get these out of the way before unhitching. Regarding the chains, you should always cross them while towing.
Remove the Weight Distribution Bars
We have the Blue Ox Swaypro Weight Distribution Hitch and it requires the jack to lift the car to enable the bars to be removed. Once the jack is raised, the bars can easily be removed.
Remove Hitch Lock
We always keep a lock attached to our trailer coupler. It is vital while towing to ensure the trailer remains properly attached. It is also beneficial as a theft deterrent. We previously used a long padlock, but wanted something that was easier to get off and on. We settled on the Bulldog Adjustable Lock.
Bulldog Trailer Coupler Lock
So far, we really like the ease of putting it on and off. It works much better than the padlock. It fits snugly, which would make it difficult to cut off.
Bulldog Lock Installed on Coupler
Unhitching From the Tow Vehicle
Next, lower the jack to release the strain off the ball. Once lowered, pull up the lever on the tongue. Now, lift it off the ball. Ideally, the ball will drop from the jack. Sometimes, it can be difficult to decouple. In those circumstances, it may be necessary to pull forward or backward ever so slightly. This is the most stressful step in the unhitching process for me.
Level Front to Back
Next, adjust the jack so that the camper is level from front to back. I always set a level on the floor parallel to the door and it makes it easy to find that level sweet spot using the jack.
Leveling from front to back
Lowering the Stabilizers
Lastly, lower the stabilizers. This is the last step of unhitching and taking them up is the first step of hitching. It is important because the stabilizers can be damaged if the camper is raised or lowered by the jack while they are down.
Stabilizers are lowered
Setup
Now that the camper is unhitched, it is ready for setup. Actually, you can attach the water and power before unhitching. For example, if the weather is hot or cold, you might want to get the power on so the inside temperature can be impacted sooner.
Electrical Hookup
We recommend that you include a surge suppressor in your electrical hookup. A suppressor can protect your camper’s electrical system if there is a problem with a campground’s power supply. It can also identify electrical other issues.
Surge suppressor
Connecting to City Water
We always attach a water pressure regulator and a filter to our water connection. The meter protects your water system if there is too much pressure in the campground.
I have a couple of tips regarding the water. First, it is not necessarily to over tighten the connections. Second, be sure the gasket is in the fitting of the hose.
Water pressure meter and filterConnected to City water
Holding Tanks
We usually do not have sewer connections because most of our camping is in State Parks. When we do have sewer at our site, we keep both the gray and black tanks closed until we are ready to empty. I understand that it is critical to keep the black tank closed to prevent issues due to the lack of water. Also, you wouldn’t want anything that might be in the sewer to have access to your camper.
Drain for Holding Tanks
New Campers, In Conclusion
It can be intimidating to set up a camper if you are inexperienced. We learned how to do this over time, with some mistakes. Now, we consistently strive follow the process above and have it down to a routine. If this post is helpful to you, check out our page, Camping Resources for New Teardrop Campers.
This week’s vegetable is an easy one to have available because it is accessible year round and keeps well in the refrigerator for several days. Routinely, I have about three different ways to serve them. However, I most often include zucchini in a frittata. A frittata is a special breakfast in our home, but it is so hearty that it is also an excellent choice for brunch or dinner.
I don’t generally follow a recipe for my frittatas, so the ingredients can vary. Most often though, I include zucchini or summer squash. However, either type of squash works well in a frittata.
Special Equipment
I have always made my frittatas in an iron skillet. So, for me, it would feel unnatural to use anything else. But, any skillet or pan that can go from stovetop to oven could be used. My choice though, will always be an iron skillet.
Frittata Possibilities
Eggs are the only absolute necessity in a frittata, everything else can vary. Butter or oil will work, but I prefer butter. Olive oil is, of course, a healthier choice. The sky is the limit with vegetables because they are cooked until tender crisp on the stovetop. Any cheese that you like will also do just fine. Lastly, a variety of seasonings work well in a frittata, such as basil, oregano, dill, thyme, cayenne pepper, or chives.
Zucchini Frittata Ingredients
Zucchini Frittata Recipe
Ingredients
2 Tbsp Butter or Olive Oil
1 c. Zucchini, diced
1/2 c. Onion, diced
1/2 c. Red Bell Pepper, diced
Salt and Pepper to taste
1/8 tsp Accent
1/2 tsp Basil
1/2 cup Cherry Tomatoes
6 Large Eggs, Slightly beaten
3/4 c. Gruyere & Swiss Blend Cheese, shredded
Directions
Preheat oven to 350 degrees.
Melt butter in ovenproof skillet over stovetop. Add all vegetables except tomatoes and cook over medium-high heat until tender-crisp. Add desired salt and pepper. Sprinkle Accent and Italian Seasoning over vegetables. Lastly, add whole cherry tomatoes and distribute them evenly in skillet.
Next, pour beaten eggs evenly over vegetables; do not stir. Sprinkle cheese over top. Place skillet into preheated oven and cook for approximately 18 minutes or until eggs are firm.
Sautéed Vegetables
Optional Garnishes
Salsa, Tomato or Green Chili
Avocado Slices
This Frittata Version
This was my first time using the Gruyere/Swiss blend cheese and green chili salsa. It gave it a bit of a different taste, more complex, but we really liked it.
Because there was no previous recipe, I adjusted my estimated measurements for several ingredients as I prepared it. I must say, this was a delicious meal. My husband agreed!
Sunday Brunch
Good Friends Good Food Blogs (GFGF)
Check out other zucchini dishes by my GFGF friends. I have been very impressed by their cooking expertise because of all the cool ways they have prepared vegetables so far.
If you have never made a frittata, they are a marvelous way to turn a variety of on-hand vegetables into a quick and delicious meal. Zucchini is an excellent vegetable because it can be kept in your vegetable bin ready to make a delicious frittata happen.
The vegetable for this week’s Good Friends Good Food recipes is tomatoes. I really love tomatoes and grilled tomatoes are a favorite in our house. In the past, I have made them on the grill and in the oven. However, I suspected they would be really quick and easy in the air fryer. This proved to be correct. They were so easy to make that the air fryer will be my preferred method of cooking going forward.
Air Fryer Cooking
I have only had my air fryer for five months, but it is a very good small appliance for lots of different foods. After much research, I settled on the Ninja Air Fryer. So far, I have been really pleased with this brand and model.
A few things about grilling tomatoes in the air fryer to keep in mind:
There is no need to preheat the fryer for tomatoes.
There is certainly no need to heat up your kitchen with a big oven.
No oil or grease is needed in the fryer because the bottom of the tomatoes are oiled and this prevents sticking.
Above all, the cooking basket and tray can be put into the dishwasher. I love this benefit of the air fryer.
The tomatoes can be touching without impacting results.
The cooking time can vary based upon the thickness and level of ripeness of the tomatoes.
Tomatoes ready to cook in air fryer
Grilled Tomatoes, The Recipe
Ingredients
3-4 Tomatoes, washed and cut into halves
Olive Oil, approx 2 Tbsp
Salt, to taste
Pepper, to taste
Dried Basil, to taste
Garlic Powder, to taste
Dried Chives, to taste
Optional: Parmesan Cheese or Breadcrumbs
Instructions
Use a brush to liberally spread olive oil on bottom and top of each tomato half. Next, place the tomatoes in a single layer in the air fryer basket. Sprinkle salt, pepper, dried basil, garlic powder, and dried chives as thick or as light as desired.
After that, cook at 350 degrees for 15- 20 minutes. Because tomatoes vary in size and ripeness, check on how the tomatoes are progressing at 15 minutes. They should be soft and lightly browned.
If adding optional cheese or breadcrumbs, add during the last five minutes of cooking.
My Grilled Tomatoes
I omitted adding cheese or breadcrumbs because we are on a special one-week diet. But, they were still marvelous!
I certainly recommend grilled tomatoes in the air fryer. I hope you give them a try.
Moreover, if interested in other vegetables that I have cooked with Good Friends Good Food, check out my page, Vegetables with Good Friends, Good Food. I will be updating the page with each new vegetable. The next vegetable is zucchini!
Earlier, we did some camping after the pandemic began, but without friends. It changes the dynamic a bit when you are with people you know. For instance, it can be easy to get too close to friends. What is safe and what is not must be considered in a group that typically has potlucks and games. On this trip, we spent five days with another couple in one location and three days with a group of twenty or so at another location. For the large group, we met in a very large circle.
Social Distancing
Fortunately, we felt safe in both environments. I must say, it was really, really good to spend time with other people. My husband has been a remarkable companion through this crisis and I do my best, but an expanded set of people to spend time with was great for both of us.
Stopover in Augusta
The drive to Myrtle Beach was longer than we like to make in one day. So, we stopped at a municipal park campground, Diamond Lakes. It was nice and relatively inexpensive for full hookups. Additionally, it was close to our route to the beach and our site was right on the lake. We will definitely stay there again if in the area.
Diamond Lakes Site # 24
Pandemic Camping with a Friends at Myrtle Beach
We camped with our friends at Ocean Lakes Family Campground. Originally, Panama City was the destination, but a hurricane nixed that plan. Consequently, we booked the only two sites available out of 859 campsites. I can safely say that we had the worst site in the entire campground. The sewer hookup was at the absolute back of the unlevel site. Additionally, there were so many large tree roots on our site, we couldn’t use our rug. I called our little area the Root Room.
Ours was the only site that was terrible though, which might be why it was available. Overall, Ocean Lakes was a nice campground.
Site # 4181, The Root Room
The campground is on the beach and we had one excellent day in the sun. The water was warm, but a bit rough. Glorious!
One lovely day at the beach
We also had an opportunity to enjoy the lazy river. It was such a relaxing day with clear skies and perfect temperatures.
Fun times on the lazy river
Ocean Lakes has tons of golf carts for rental. The place is so large that the carts are very popular with the visitors. They were everywhere and often an annoyance as there was a lot of just cruising. But, we went with the flow and rented one too. It was fun. The place has 300 rental unit houses. The resort owns the property and individuals own the houses. It was fun driving through checking them out. Some were rather shoddy, but many were very nice!
Golf Carts Everywhere
We had lots of rain for three of our days at Myrtle Beach, but we did share some meals and games outside. On our last night, we actually ate together indoors. It was great seeing our friends!
Another Stopover
Paris Mountain State Park was a break in our trip to the event in Georgia. The campground is very nice with lots of beautiful trails and a very clean bathhouse. We got the only site available. It was an ADA, but we were able to stay with a phone call explaining our health issues. Though the campground was great, there were very narrow, hilly, and winding roads. I drove our camper to our site and it was stressful.
Site # 29 (ADA)
We had two nights at Paris Mountain and one full day. It enabled us to enjoy the park and the absolutely perfect weather. I particularly enjoyed a hike around Lake Placid. It was a great day and I highly recommend this park.
Hiking around the lake and reservoir
Vogel State Park with SE T@Bs, T@Gs and Friends
This was our second trip to Vogel with the SE group. Several of the folks at the event we knew because we have camped with them before. It was great seeing old friends and making new ones. It is so much fun hanging out with this group. Everyone was careful to maintain a distance and everything was outside. Thanks to Jeff, our leader, we were fortunate to have a site at the center of most of the activities.
Site #31
We walked around the lake on another beautiful day. The weather at Vogel was great except for rain on the last night.
Beautiful Lake at Vogel State Park
Recently, we have been discussing getting a dog. My husband fell in love with Asher, a Schnoodle belonging to Lisa in our group. Doesn’t he look like a happy man?
Greg and Asher
Shelia, one of the group members, made really nice teardrop masks for those in attendance. We love ours!
Special Masks from Shelia
A Pandemic/Boondocking Option
Angie, another group member, brought a body wash spray that she requested someone formulate for her. If boondocking or with limited access to water, this can be a good thing to have. The bottle is $10. If interested and on Facebook, there is a FB page, Shaysoaps.
Shay’s Special Blend
This was a very special trip because we were able to see friends at both places. We have really missed other people! I feel we were careful regarding pandemic risks and as long as we stayed safe, going camping was a worthwhile thing to do. This trip had two stops in South Carolina and two in Georgia. If you would like to read about our other trips, see States Visited, a Campsite Resource.