T@B 400 Modification and Third Year Camping

T@B 400 Modification

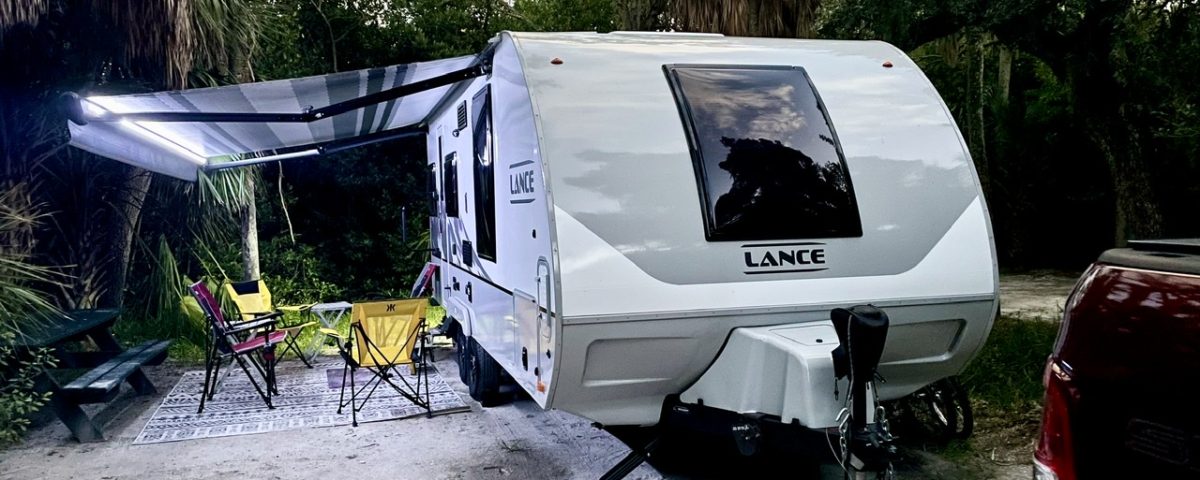
We began our third year of camping with a nüCamp T@B 400 Boondock Lite and we love it!  I have provided a link to the NüCamp T@B 400.  It is fantastic camper, as was our previous nüCamp product, a T@G MAX XL.   The 400 was designed with a lot of input from owners.  Consequently,  we did not need much in the way of T@B 400 modification.  We only made a few changes and most were in the front storage compartment.

Lever on Storage Compartment

My husband saw a Storage compartment lever on a later 400 model that was not on ours.  It holds the lid open with a shock.   We obtained the part at ùCamp 19 and my husband installed it.  It makes it much easier to use the storage compartment.

400 modification Lever for Storage Lid
Storage Compartment Lever

Enclosed Back of Compartment

The front storage compartment was totally open on the back, which could allow small items to slip through.  We don’t carry a lot of small items in there, but wanted the option to do so.  My husband added a piece of metal with holes throughout so the area would be ventilated.

400 Modification Back Panel
Back Panel for Storage Compartment

400 Modification, 2nd Propane Tank

For future boondocking, we wanted an additional propane tank, especially since our storage compartment is large enough hold it.   We had our dealer, Bankston, add the tank and holder while our camper was there for a replacement to a window shade.

400 Modification Extra Propane Tank
Extra Propane Tank

400 Modification-Zamp Connector

We purchased a Zamp Solar Suitcase when we had our T@G.  However, the T@B 400 does not come with a Zamp connection.  Because we hope to do more boondocking using the Zamp, my husband installed the connection.  I was very worried about putting a hole in our brand new camper, but he did an amazing job.   We have a separate post with step-by-step photos on how he did it:  Zamp Connector Added to our New Camper.

Zamp Connector
Zamp Connector

New United States Map

We attached our previous United States map to our T@G and we sold it last year.  So, we bought a new one just like our old one and filled in the states in which we have camped in both of our campers.  Somehow, I find it gratifying  filling in that map.

States visited
States Visited by Year Three

Camper Name

Our new camper has the same name as our first camper.  The T@G was named Endeavor, so the 400 became Endeavor II.  The T@G’s name was on the back , but that did not work with the 400.  We settled on the front of the 400 for the name and I think it looks pretty good.

I ordered the letters from DIY Lettering . It was easy to install and only $25.   We also added the blog’s URL in smaller letters on the side of the camper for $24.

400 Modification, Endeavor II
Endeavor II
Blog URL
Blog URL

400 Modification Not Done

In life, you can’t have everything.  We wanted the platform that we see on many T@Gs and T@Bs because it is really nice for storage.  I asked the experts at nüCamp about adding it to our 400 while we were in Ohio.  Sadly, they did not recommend adding the platform to our model despite the fact that our vehicle can handle a tongue weight of 900 pounds.

We can’t install the platform because our air conditioner is at the front of our camper, which could make the tongue weight too heavy relative to the overall weight of the camper if we added much weight on the platform.   The air conditioner for the 2020 model 400 was moved to the back of the camper and it allows the platform to be added.  The tongue weight of our 2019 model is 465, while the 2020 model is only 372 pounds.

Warranty Replacement

This was not a modification, but it is something altered on our camper.  The shade on our front window became somewhat difficult to close soon after we bought the camper.  It bunched up in one side at the bottom.  It would only close correctly if done very slowly.

Our dealer, Bankston RV, confirmed that our shade had some issues and a different one was currently being used.  Bankston ordered the replacement and installed it.   It lowers much easier now.  However, because the shade is so large and we want to keep the folds crisp, we keep it down when in our storage facility.

Camping Trips

All of our trips were in our new T@B 400 for this third year of camping.  We took five trips and traveled 5,988 miles for a total of 63 nights in the camper.  One trip was quite long with 35 nights and we took two trips each at ten and four nights.  All our camping was with groups except the trips to new states.  This was great because we really like camping with friends.

We have a  goal to camp in all fifty states.  I am happy to say that we added six new states this year to our map:  North Carolina, South Carolina, Virginia, West Virginia, Delaware, and Maryland.   Additionally, we camped in Alabama, Georgia, Ohio, and Florida, though not for the first time.  Can you tell I was an accountant?

Now Camping Year 4 Begins!
Retired couple


Teardrop Modification and Travel Summary 2nd Year

Our second year of camping has gone by so quickly.   Our teardrop is a NuCamp 2017 T@G MAX XL and it has served us so well!  This post is a summary of the miles we have traveled in the past year and the teardrop modification we have made.

Second Year Camping Trips

We only took six camping trips this past year, which does not sound like a lot for a retired couple.  However, two were monthlong trips and one included three stops. We hauled our teardrop 10,451 miles—three times the miles traveled in our first year.  We revisited three nearby states, but also camped in thirteen new states.  Our hope is to eventually camp in every state.

The trips included 36 different campgrounds and 75 nights away from home.  We were inexperienced newbies when we began camping two years ago.  Now, I think of us as seasoned campers.

Below are links to the plans for our two monthlong trips.   Our first one was out west during the winter and the second was a summer trip north.    Those trips were so amazing!

Planning That First Long Trip

Summer Camping, Planning a Long Summer Trip

Teardrop Modification

Our camper is so well designed that we have not needed much in the way of teardrop modification.  Our mods were really just minor changes to increase comfort and functionality of the camper.

Heater Stand

This may not technically be considered a modification because everything is removable.  We needed a heater for our winter trip out west; so we purchased a Honeywell HCE 100B Heat Bud Ceramic Heater.  It has tip over protection,  but we soon realized that we would need a stable surface for it to operate.  A Facebook user had posted photos of a stand for a heater and my husband built one that was similar.  The stand has proven to work very well.

Heater on Stand

The holes on the back panel enable the stand to rest very securely upon the door handles.  There is a hole in the bottom panel for the cord to flow through to the electrical outlet.  Lastly, there are two piano hinge to allow the stand to lay flat for easier storage in the cabinet when unused.


Teardrop Modification Heater Stand
Heater stand

An added bonus, the stand works great for holding tablets that are being charged when there is no need for a heater.

Under Camper Storage Container

We needed a place to store my husband’s shoes and the inspiration for this teardrop modification came from another post on a Facebook group.  It required drilling holes below the bed and mounting a track in which a plastic box can slide.

Teardrop Modification Storage bin
Under Camper Storage

This has worked well for the shoes.  We store the  bin in the cabin when we travel.  We were concerned that we might forget to remove it when the camper is being pulled, but so far, so good.

Mesh Net Door Storage

We like to watch TV or DVDs before sleeping and I am the keeper of remotes.  Before we did this teardrop modification, I was often searching for them.  We have seen that other T@G owners have made this mod and at the rally in Ohio, we learned NüCamp is now installing mesh storage on the doors of new units.  I love this mod!

Double Sided Velcro Strips

We used Velcro, but noticed the factory was using screws to attach the mesh pockets.

Mesh Storage on T@G Door
Mesh Storage on Door

When the door is closed, the storage pocket is just above the bed.  We installed these on both sides.

Storage on Door
Storage Behind Television

This is another modification that many owners have made that is also included at the factory on new models.  It involved removing the panel and putting hinges on the door.  My husband finished the inside with particle board for ventilation purposes.

Storage behind T@G TV
Storage Behind TV
Handle installed to open door
Finished modification
Window Rail Brushes

We learned that nüCamp will provide rail brushes for the windows to prevent bugs from coming in.  You have to install them, but it is not difficult.  We obtained them at no charge from the parts department.

We really saw the need for them earlier this year while camping in an area that was overrun by mosquitoes.  SW Trip, Stop #2 Sea Rim State Park in Texas

Rail Brushes
Rail Brushes and Instructions

The photo below shows the side of the window without the rail brushes.

Window Rail Before Installation

The rail brushes installed below should be effective in keeping out insects.

Window Rail with Installed Brush

Conclusion

Our T&G has been wonderful this last year!  The modifications we made primarily added a little more storage in key areas and we are happy with them.

In this next year, we are considering getting a bigger camper.  The  nüCamp 400 will likely be the replacement.   However, it is hard for me to imagine loving any other camper as much as Endeavor.

Our reasons are simple.  We now know how much we love to travel and are willing to take it to a higher level to have something that provides comfortable daytime space inside.

We will keep you posted!

Retired couple