
Solar Panels for Dummies
We are brand new to solar panels and I must say, we do not have them totally figured out yet. I am an “instructions gal” and usually can make sense of things by reading the instructions. However, in the case of solar panels, much of it may as well be in a foreign language.
I would love to read a post entitled “Solar Panels for Dummies”, but have not yet seen one for camper batteries. So I am trying to learn enough to provide some basic language on the subject.
Why Solar Panels
It seems that most of the National Parks sites do not have electrical hookups. Also, I am aware there are great places out west to boondock. While we would love the camp in some of those places, we do like a few of the comforts that electricity provides.
We considered a generator, but they are not allowed at some campgrounds and the idea of hauling one around plus the fuel was not very appealing. They can also be noisy. We may eventually purchase a generator, but I want to fully understand solar first to see if it can meet our needs.
Our Equipment
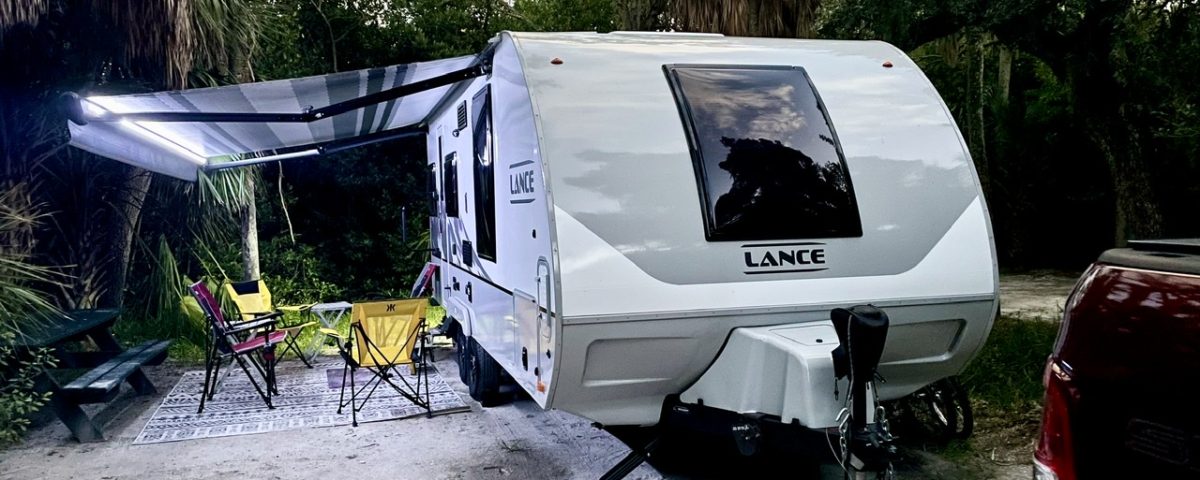
A little background first: we have a T@G MAX XL teardrop with the Norcold cooler. (From reading posts on Facebook groups, I learned that the cooler really draws the amps.) We knew that the Norcold could be an issue, but wanted to see firsthand how it would work. So, we treated this first use as a learning experiment.
Some Basic Information
Amp Hour (Ah)
An Ampere (Amp) is a measure of the amount of energy stored in a battery.
A battery with a capacity of one amp could supply a current of one amp for one hour or two amps for 1/2 hour or 1/3 amp for three hours before becoming fully discharged.
A battery with 100 Ah would produce 5 amps over 20 hours, but if discharged at a high rate like 50 amps in an hour, it would only last one hour because of the high rate of discharge.
Converting Watts to Amps/Amps to Watts
Watts = Amps x Voltage (12 If a 12 Volt Battery)
Amps = Watts / Voltage (12 If a 12 volt battery)
The Solar Panels
We purchased Zamp 80P solar panels and used them for the first time on a recent trip that ended in a National Park in Kentucky. Zamp was chosen because the camper was already wired for it, they appear to be of high quality, and are 100% waterproof.

The photo below shows what the inside looks like when opened. Inside is the controller, cord, and fold-out adjustable legs. It also comes with an adapter to hook directly to a 12 volt battery, but we did not need it.

The Charging Environment
We had a one night stay in Michigan’s Upper Peninsula and hooked up the panels, but we arrived late and left early the next day. It was cooler there and the Norcold cooler did not have to run as much. It was too short a time to really make an assessment.
The last two days of our trip was in Kentucky at Mammoth Cave Campground with no electricity. We had a shaded site, but there was quite a bit of sun on the asphalt pull through. We did not have an extension cord, but I can see the valve of having one in the future. However, by moving the panels as the sun moved, we were able to get as high as 4.0 amps for part of the day.
It was Kentucky in the late summer, so it was predictably hot—low nineties in the day and low seventies at night. The heat worsened the issues we had with the solar panels and the Norcold. Cooler weather might have made a big difference.
Preserving the Battery
The 12 volt battery can be destroyed if allowed to go too low. So, it is not a bad idea to have a voltage meter to monitor activity. This link is for an inexpensive one that can be ordered from Walmart. It plugs directly into the 12 volt receptacle on the inside and also the back of our T@G. The solar panel controller also monitors battery voltage.
The table below shows the voltage and related state of charge for a 12 volt battery. The battery should stay in the green zone to provide the longest life. The Zamp controller will show the battery in a warning state if it dips below 12.5 volts.

Set-Up
The Zamp instructions stated that you must have the correct battery type indicated on the controller or you could damage your battery. My husband tells me that ours is a wet battery and AGM is the default, so I had to change it. The lower black button on the right on the controller changes the battery type. Once you change the type, it retains the information.
Setting up the panels is very easy. First, open the panels and pull out the legs. Next, position the panels so they are directly facing the sun. Then, plug the cord directly into the external receptacle on the driver’s side of the case that holds the battery and propane. You must press it in firmly. (See photo below). You are now ready to go. As soon as the cord is plugged into the receptacle during daylight, the panels will begin working and the controller will begin displaying data.


The Data
The controller has three lights that provide information about the charging status and three lights that reflect the condition of the battery.
In the photo below, charging is occurring (red light) and is providing a charge to the battery (blue light), and the battery voltage is above 12.5 volts (green light). This is how the controller looked most of the time we were using the solar panels.

Below is a table from the manual that explains how to interpret what the lights mean that are on the controller.

Red Charging Status: When receiving sunlight, the light is always red, however the light will flash when the solar panel is weak. It is unlit if it is dark and there is no charging occurring.
Blue Charging Indicator: This light is on when the battery is being charged.
Green Float Charge Indicator: This light indicates that float charging is occurring. It would mean that battery is fully charged and is being maintained at a safe level. A wet battery is fully charged at 13.6 volts. This light did not come on while we were using the panels.
Battery Condition Green: Battery is above 12.5 Volts (+-0.2V). For most of the time we were using our solar panels, this light was on.
Battery Condition Yellow: Battery is below 12.5 Volts and above 11.5 Volts (+-0.02V). We saw the yellow light several times when the Norcold cooler was running.
Battery Condition Red: Battery is below 11.5 Volts (+-0.02V). Thankfully, we did not see this light on during our usage of the panels.
Amp/Volt Button: Pressing this button toggles between displaying the current battery voltage, the charging current, and charged capacity (Amp-hour).
Results on this Trip
On our first night, we only had a few hours of limited sunlight. When the sunlight was greatly reduced and the Norcold was running, the yellow light came on. We feared we would damage our battery if we ran the cooler or used the fan, so we turned off the power from the battery.
The next day, we had many hours of sunlight and were obtaining as much as 4 amps and I was hopeful we could run the fan that night. We ran the Norcold all day, charged our electronics, and played music on the DVD using Bluetooth and music on my phone. A couple of times in the hotter part of the day, the yellow battery light came on, but when the Norcold stopped running, the battery light would eventually move to green.

However, when the sun was down, the battery light stayed yellow and there was no charge occurring. Also, an (E) light was showing on the Norcold. This appears to be a safety measure. We felt our only choice was to turn off the power so we endured another hot night without the fan.
Load Analysis
As we clearly have issues trying to run the items we planned, a reader suggested that a load analysis would be helpful. Below are the 12 Volt items in our camper and the amount of energy each uses in an hour. There is also a column estimating the number of hours in a day they would be used and a projected daily total.
Because there are some solar options like solar power generators, I added a chart for items that we use when camping that run on 110. We are a long way from such a solution, but I like knowing how much energy the items draw.

It is clear from reviewing the 12 volt list that the Norcold is a major energy hog, claiming an estimated 43% of the total daily energy. Converter amps would also be significantly lower without the Norcol, saving perhaps 8 amps. If we use an ice chest instead of the Norcol, our estimated daily amps goes down to approximately 37. This is a much more reasonable number, considering our current equipment.
Increasing Energy Capacity
There are several ways to increase energy capacity if not happy with amount of power the solar panels provide.
- Increase battery capacity. Our battery only provides only 65 amps, but the same brand produces a similar battery with 105 amps. This would be a significant improvement over the current battery. (The battery does weigh a little more than the current one.)
- Change battery configuration to two 6 V batteries. This works much better than 12 V for dry camping. The 6 V’s have 600-700 life cycles as compared to the 12 V’s 100-150. Amps would be ample at 180 or up to 220 amp hours per battery. However, they are they are more expensive and it is likely modifications would be needed to make the two batteries fit in an existing camper. They are taller than 12 V batteries, but have a similar footprint. (A reader of this post stated they had great results using two 6 V batteries.)
- Purchase higher solar panel wattage. Our panels are 80 watts and can produce a max of 4.6 amps per hour. This is not a lot of capacity if sunshine is limited.
- Purchase a portable solar power generator. This is a pricey option, but it enables the use of 110 items and also it would be a good item to have at home during power outages. They are cleaner and safer than a generator. (I think I want one!). Two brands appear to be dominant in the market, the Inergy Kodiak and the Gold Zero Lithium Yeti System. Each can charge with solar panels or a wall outlet. A good comparison of the two systems can be found on YouTube.
Lessons Learned
While the solar panels did not provide adequate charging for our needs on this trip, I feel we can take what we have learned and make some changes for future success. We will make the following changes next time we are dry camping.
- Substitute a high-quality cooler for the Norcold. We were fighting a losing battle trying to use the Norcold in ninety-degree weather. The Norcold might work with the panels in a much cooler environment, but we will not be expecting to use it when dry camping in the future.
- Purchase an extension cord for the panels. It is clear that it would be handy in some situations.
- (Perhaps) purchase a portable solar power generator.
I look forward to another opportunity to use the solar panels and will update this post on our resources page with any new information.
Happy Camping!
